


Bottom drawer slides are rails fitted beneath a drawer or along its lower edges. The term covers single center rails, paired concealed undermount slides, roller slides, and traditional wood runners, each with different clearance, drawer-box, and mounting needs.
Table of Contents
What Are Bottom Drawer Slides?
Bottom-mounted hardware supports and guides a drawer from below rather than from the middle of its side walls. Product listings often mix “bottom mount” and “undermount,” so identify the rail count, mounting position, and release hardware before buying replacements.
Center-Mount Slides
A center-mount slide uses one rail beneath the drawer’s centerline. It suits dressers, desks, and older furniture where side clearance is limited, but accurate front-to-rear alignment matters because a slight offset makes the drawer twist or rub.
Many center rails provide about three-quarter extension. The single support also offers less resistance to side-to-side racking, which becomes noticeable as a wide drawer opens: the front can feel loose in the hand before the rail appears visibly worn.
Concealed Undermount Slides
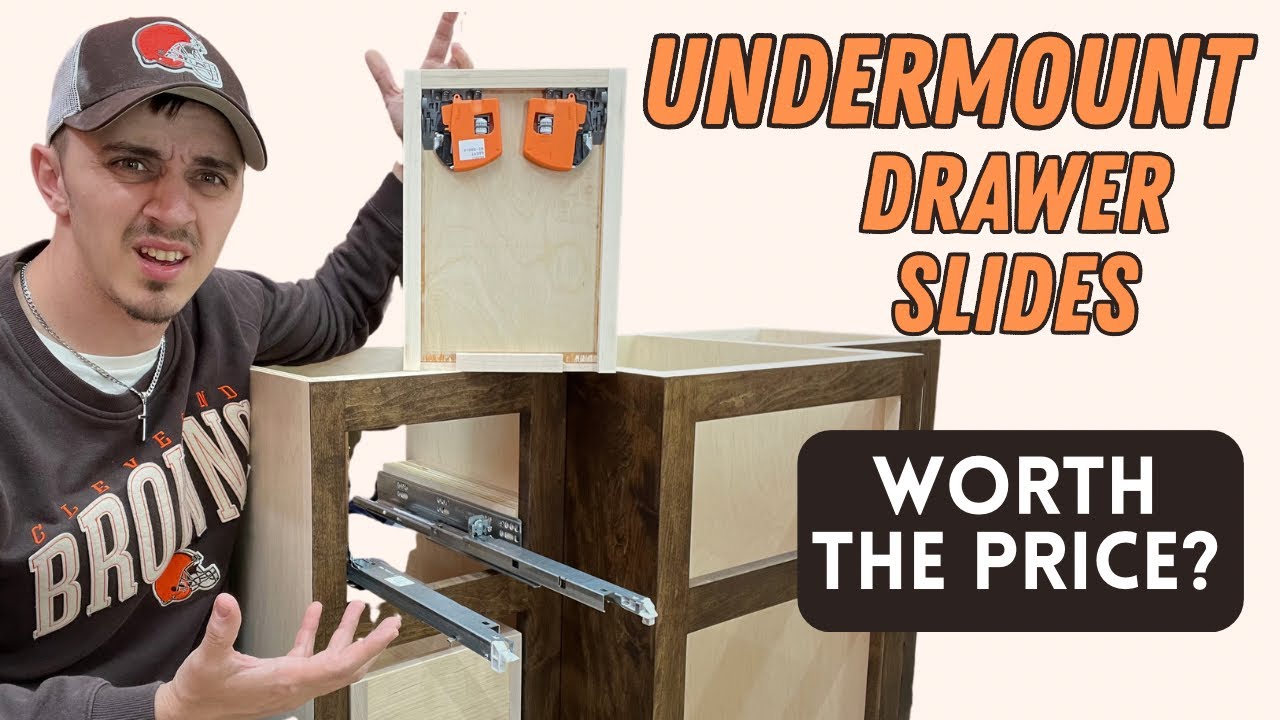
Concealed undermount slides use a left and right rail hidden beneath the drawer. Front locking clips connect the box to the rails, while hooks or pins often engage holes or notches at the rear.
These systems can provide full extension, soft close, and tool-free removal, yet they demand model-specific dimensions. Drawer width, side thickness, bottom recess, rear boring, and clip type must match the selected slide family; similar-looking parts may not interchange.
Bottom-Mount Roller Slides
Roller slides come as left and right epoxy-coated rails with nylon wheels. The drawer members attach near the lower side edges, leaving part of the hardware visible when the drawer opens.
These inexpensive drawer glides commonly offer partial extension and a sloped self-closing section. Many need close to 1/2 inch of side space on each side, but the product drawing controls the final measurement.
Traditional Wood Runners
Wood drawer runners include hardwood strips, center tracks, and guide blocks found in antique furniture. Humidity can swell the rubbing surfaces, while years of use can leave smooth, dark grooves that catch a fingernail.
Paraffin wax can reduce dry friction after the surfaces are cleaned and aligned. Wax won’t repair a broken guide, loose joint, or badly worn runner; those faults need a fitted replacement strip, which can be held during fitting with suitable woodworking clamps.
Mounting Orientation Limits
Don’t rotate an ordinary side-mount slide flat beneath a drawer unless its maker permits that orientation. A ball-bearing slide rated vertically can deflect much more when laid flat, reducing usable load capacity and causing the moving members to scrape.
Bottom Drawer Slide Types Compared
The best slide type depends on fit and access, not its closing feature alone. Center rails simplify some furniture repairs, concealed pairs offer cleaner full access, roller slides keep costs low, and wood runners preserve traditional construction.
Extension and Travel
Slide travel describes how far the drawer moves, which may differ slightly from the slide’s nominal length. A theoretical 21-inch slide with 75% travel moves about 15.75 inches, leaving the back portion inside the cabinet.
- Three-quarter extension: suitable for shallow dresser and utility drawers.
- Full extension: exposes nearly the whole drawer for cookware, files, or tools.
- Over-travel: carries the drawer beyond the cabinet face where a countertop blocks access.
Visibility and Access
Concealed rails remain nearly invisible beneath an open drawer, while roller-slide members can be seen along the lower sides. Full extension improves rear drawer access, but it also places more leverage on fasteners when a loaded drawer is fully open.
Soft-Close Systems
A soft-close damper catches the drawer during the final part of travel, slows it, and draws it shut. The mechanism reduces slamming but can’t correct pinched rails, a twisted box, or locking clips installed at different depths.
Self-Close Systems
Self-close hardware pulls the drawer inward near its closed position without necessarily damping its speed. Basic roller slides often use rail geometry and gravity, so the drawer may accelerate slightly and finish with a light plastic click.
Push-to-Open Systems
Push-to-open slides release after the drawer front is pressed, making them useful for handleless cabinets. They require consistent front gaps and enough spring travel; many can’t be combined with a separate soft-close unit unless sold as one integrated system.
Application Comparison
| Slide type | Rails | Typical extension | Visibility | Common use | Main fit issue |
|---|---|---|---|---|---|
| Center mount | One | Often 3/4 | Mostly hidden | Dressers and repairs | Center alignment and support |
| Concealed undermount | Two | Often full | Hidden | Kitchens and built-ins | Exact drawer dimensions |
| Bottom-mount roller | Two | Often 3/4 | Partly visible | Utility and older cabinets | Side clearance |
| Wood runner | One or more | Variable | Mostly hidden | Traditional furniture | Wear and wood movement |
These are typical characteristics, not universal specifications. Use the selected manufacturer’s drawing to confirm extension, dimensions, permitted orientation, and capacity.
How to Measure Bottom Drawer Slides
Measure the cabinet opening, drawer box, usable depth, and existing hardware before selecting replacement drawer tracks. Take preliminary dimensions to at least 1/16 inch, then follow the manufacturer’s exact imperial or metric specification.
Cabinet Opening
Measure the clear opening width at the front, middle, and rear. Repeat the height measurement at several points; changing figures expose a bowed side, leaning partition, or out-of-square face frame that can pinch new slides.
Measure usable depth from the slide’s front mounting plane to the first rear obstruction. Subtract space occupied by cabinet backs, plumbing, hinges, cables, blocking, and rear mounting brackets.
Drawer Box
Record the drawer box’s outside width, depth, side height, side thickness, bottom thickness, and bottom position. Don’t measure the decorative front as the drawer-box width; an overlay front can be several inches wider than the actual box.
Slide Length
Common lengths include 12, 14, 16, 18, 20, 22, and 24 inches, while some undermount families use cabinet-oriented sizes such as 15, 18, and 21 inches. Match length to both drawer depth and usable cabinet depth.
Don’t cut ball-bearing or soft-close slides. Some wood runners and designated center rails can be shortened, but cutting an enclosed metal mechanism can release bearings, remove stops, and destroy the closing mechanism.
Required Clearance
Roller bottom mounts often need about 1/2 inch per side. Concealed undermount systems use a drawer-width deduction tied to slide model and drawer-side thickness, while a center rail follows centerline and support requirements instead of a universal side gap.
Don’t round a metric deduction to a convenient fraction without checking tolerance. A difference that looks tiny on a tape can make locking devices resist engagement or leave the drawer with side-to-side play.
Existing Hardware
Photograph rail markings, screw positions, guide blocks, sockets, front clips, and rear notches before disassembly. Matching the existing slide family often avoids drilling new holes or rebuilding the drawer box.
Drawer and Cabinet Compatibility
A drawer is compatible only when its width, bottom position, side thickness, depth, and cabinet support match the slide specification. Many failed undermount conversions start with buying a desirable feature before checking the drawer construction.
Drawer-Bottom Position
Paired undermount rails usually need space below the box and often require a recessed drawer bottom. A bottom panel fastened flush beneath the sides may block the rails or leave no sound location for rear hooks and front locking clips.
Center slides need a straight, firm mounting surface along the box centerline. Don’t drive load-bearing screws into a thin bottom panel unless the system calls for it; add a fitted hardwood support tied into the front and back of the drawer.
Drawer-Side Thickness
Many undermount slide families accommodate 1/2-inch or 5/8-inch sides, with nearby metric sizes also common. The required box-width deduction changes by series, so side thickness must be checked against the official installation sheet rather than copied from another model.
Face-Frame Cabinets
A face frame can support the slide at the front, but the rear may need brackets, mounting strips, or spacers to create parallel support surfaces. Never hang a loaded slide from thin hardboard backing; reinforce it into the cabinet structure.
Frameless Cabinets
Frameless cabinets often let rails mount directly to side panels at a consistent setback. Check for bowed particleboard and confirm that screws don’t break through the outer panel; the correct fastener length matters as much as slide alignment.
Inset and Overlay Fronts
Inset drawer fronts need precise depth adjustment because the front must sit evenly within the frame. Overlay fronts conceal small opening variations, but they won’t correct rails mounted out of level or at unequal depths.
Conversion Requirements
Changing from side-mount to concealed undermount slides may require narrowing the box, recessing the bottom, cutting rear notches, boring hook holes, and installing locking clips. Rebuilding the box is often cleaner than weakening existing sides with overlapping modifications.
Choosing the Right Drawer Slides
Choose bottom drawer slides by mounting type and physical fit before comparing soft close, finish, or pack size. The correct sequence prevents the common mistake of buying feature-rich hardware that can’t attach to the existing drawer box.
Fit Before Features
- Identify the current mounting type.
- Check drawer and opening dimensions.
- Confirm usable cabinet depth.
- Inspect the drawer bottom and side thickness.
- Select the required load rating.
- Choose extension and closing features.
- Verify clips, brackets, screws, and adjustment parts.
Load Ratings
A stated load rating usually applies to an installed pair or complete system, not each rail. Drawer weight counts against the figure: a 15-pound box on a 100-pound system leaves 85 pounds before accounting for mounting quality and impact loads.
Residential concealed systems commonly carry 75 or 100 pounds per pair, but test conditions vary. For example, Blum MOVENTO specifications separate product classes and load capacities, showing why a named model matters more than a broad “heavy duty” label.
Drawer Width and Racking
Wide drawers create greater leverage on rails, fasteners, and joints. A center slide may carry the stated weight yet still allow an unevenly loaded drawer to sway sideways; two separated rails control that motion more effectively.
For pots, files, tools, or appliances, check the drawer bottom and corner joinery too. The plywood can bow and the front joint can loosen before the steel hardware reaches its published capacity, particularly when users drop weight into an open drawer.
Included Parts
Check whether the package includes one rail, one left-right pair, locking devices, rear brackets, guides, screws, or a template. “Two pieces” may mean enough hardware for one completed drawer, not two drawers.
Cost Per Drawer
Calculate completed drawer cost by adding the slide set, clips, brackets, spacers, mounting blocks, correct screws, shipping, and any installation jig. Multi-packs save money only if every drawer uses the same length and construction.
Warranty and Parts
Favor products with readable installation drawings, published capacity, clear model numbers, and available replacement clips. A cheap proprietary guide can turn into a complete hardware replacement if its small plastic block breaks and no spare is sold.
Center-Mount Product Example
The following 14-inch center slide is intended for compatible single-rail repairs. It isn’t a substitute for paired concealed undermount hardware, and “heavy duty” should be treated as a seller description until a numerical rating and test method are confirmed.

LONTAN Heavy Duty Center Slide
- Center-mount design for drawers
- Heavy-duty support for daily use
- Bottom-mount rail fits cabinets and dressers
- Smooth 3/4 extension access
- 14 inch replacement length
 Buy on Amazon
Product Compatibility Checks
Before ordering, verify the exact rail length, extension distance, cabinet depth, drawer centerline, front support, rear socket, included fasteners, and rated capacity. Compare the listing image against your old rail because a small difference in the guide profile can prevent engagement.
How to Replace Bottom Drawer Slides
Replace bottom drawer slides by documenting the old system, repairing the drawer and cabinet, mounting matched rails parallel and square, then testing the empty drawer. Keeping the same hardware family usually requires fewer alterations and produces a more predictable fit.
Identify the Existing System
Count the rails and locate them beneath the center, beneath both sides, or along the lower side edges. Record manufacturer marks, length, release method, clips, sockets, stops, and the mounting-hole pattern.
Remove the Drawer
Empty the drawer and support its front with both hands. Some drawers lift after full extension, some use release levers, and concealed systems may have clips beneath the front; forcing an unknown mechanism can snap a guide or bend the retaining tabs.
Inspect Drawer and Cabinet
Repair loose joints, split wood, swollen parts, sagging bottoms, and broken mounting blocks before installing rails. Work on a flat, stable surface such as a suitable woodworking bench, where twist in the drawer box is easier to spot.
Position the Slides
Mark centerlines or matched reference lines with a square. Fit screws through slotted holes first, leaving enough movement for adjustment; rails that differ by just a small amount in height can feel gritty and tight during travel.
Choose Proper Fasteners
Use manufacturer-approved pan-head or system screws whose heads won’t enter the moving path. Avoid brittle drywall screws, and don’t overtighten into MDF or particleboard; a stripped hole may need repair with properly selected threaded inserts where the hardware and material permit them.
Test Before Loading
Cycle the empty drawer at least ten slow times. Check smooth travel, equal clip engagement, full closure, front alignment, and easy release before adding weight in small steps.
Practical notes from use: listen and feel during the first test. A repeating metallic tick often points to a raised screw head, a rubbery stop near closure suggests poor soft-close engagement, and resistance at the same position each cycle often marks a bent rail or cabinet pinch point.
Troubleshooting Bottom Drawer Slides
Troubleshoot bottom drawer slides by checking structure and alignment before applying lubricant. Loose brackets, bowed boxes, raised fasteners, damaged rollers, and incompatible clips cause more failures than a dry rail, and oil can hide the symptom while attracting abrasive dust.
Sagging or Rubbing
A sagging drawer may have a loose rear bracket, bent center rail, weak bottom, worn roller, excessive load, or out-of-square opening. Lift the open front lightly; visible movement at a socket or mounting block identifies a structural fault rather than a lubrication issue.
Falling Off Track
A drawer that falls off a center track usually has a worn guide block, missing stop, loose socket, or misaligned rail. Repeated derailment calls for a matched replacement slide system rather than an improvised guide that fits only part of the original profile.
Incomplete Closing
Inspect for debris, a raised rear screw, unequal rail depth, a drawer that is too long, or contact between the front and cabinet. On soft-close slides, confirm both sides reach the catch together; unequal engagement can leave a narrow, visible front gap.
Hard Opening
Hard opening often comes from pinched rails, bowed cabinet sides, swollen wood, excessive load, or misaligned locking clips. Loosen the slotted-hole screws, cycle the empty drawer, and let the members settle before retightening and checking the parallel spacing.
Noisy or Rough Travel
Vacuum loose debris and wipe metal tracks with a dry cloth. Replace flattened rollers, damaged bearings, and bent members instead of packing them with grease; use a light furniture-safe wax only on compatible wood rubbing surfaces.
Soft-Close Failure
Soft-close failure can result from misalignment, excessive load, incorrect drawer depth, incompatible clips, or a damaged damper. Remove the drawer and check whether each catch resets freely; if one side feels limp or refuses to latch, replace the matched faulty component rather than mixing slide families.
FAQs
What Are Bottom Drawer Slides Called?
Bottom drawer slides are commonly called bottom-mount drawer slides. They attach to the drawer bottom and cabinet sides or frame, depending on the design. Some products are described as center-mount slides when a single rail runs beneath the drawer. Concealed undermount slides are a different, more specialized bottom-mounted option.
Are Bottom-Mount And Undermount Drawer Slides The Same?
No, bottom-mount and undermount drawer slides are not always the same. Bottom-mount slides are typically visible and attach along the lower sides or bottom edges of the drawer. Undermount slides install underneath the drawer, remain hidden when closed, and usually require a specifically sized drawer box.
How Much Clearance Do Bottom Drawer Slides Need?
Bottom-mount drawer slides often need about 1/2 inch of clearance on each side, but the exact amount depends on the model. Measure the cabinet opening and drawer box carefully before buying hardware. Undermount slides use different spacing requirements, so always check the manufacturer’s installation guide for the specific slide.
How Do I Measure For Replacement Drawer Slides?
Measure the drawer box, cabinet opening, and existing slide length before ordering replacement slides. Remove the drawer and measure the side length of the drawer box from front to back, excluding the drawer front. Also measure the available width inside the cabinet, then compare those measurements with the slide manufacturer’s clearance requirements.
Can I Convert An Existing Drawer To Undermount Slides?
Yes, you can convert an existing drawer to undermount slides if the drawer and cabinet meet the hardware requirements. The drawer must have the correct width, a solid bottom, and enough space underneath for the slides. You may need to trim the drawer, add locking clips, or build a new drawer box for a proper fit.


