


Rubber feet are elastomer supports that add grip, protect surfaces, create clearance, and reduce contact noise beneath furniture, electronics, appliances, and equipment. The right choice depends on load, dimensions, attachment method, supporting surface, and exposure to heat, oil, water, sunlight, or cleaning chemicals.
Table of Contents
Choose Rubber Feet by Application
Choose rubber feet according to the job they must perform: grip, cushioning, clearance, floor protection, or controlled movement. A soft adhesive pad may suit a small enclosure, while a loaded machine or frequently washed cutting board needs a mechanical attachment.
| Application | Good starting choice | Main checks |
|---|---|---|
| Electronics | Low-profile adhesive or screw-on feet | Vent clearance, heat, enclosure finish |
| Speakers | Medium-soft screw-on feet | Cabinet weight, compression, shelf marks |
| Furniture | Wide non-marking pads or leg caps | Floor finish, load, grip versus movement |
| Cabinets | Thin clear or black bumpers | Door gap, catch alignment, pad thickness |
| Cutting boards | Screw-on silicone or rubber foot | Moisture, screw depth, documented material |
| Machinery | Threaded mounts or rated isolators | Load, oil, vibration frequency, thread size |
| Outdoor items | EPDM or suitable silicone feet | UV, ozone, drainage, temperature cycling |
Feet, Bumpers and Glides
A rubber foot supports a static load. Rubber bumpers cushion cabinet doors, drawers, glass, and other contact points, while felt or PTFE glides reduce friction so furniture moves more freely.
Don’t select a glide when you need traction. Felt feels soft beneath a fingertip and slides quietly, but trapped grit can scratch a glossy floor; rubber feels slightly tacky and resists movement, yet some compounds can leave dark marks.
Electronics and Enclosures
Small electronics need consistent foot height, firm attachment, and enough clearance for vents. Standard black rubber isn’t automatically conductive or ESD-safe, so verify electrical requirements through the product data sheet.
Speakers and Audio: Rubber feet can stop cabinet chatter and protect shelves, but ordinary pads don’t provide complete acoustic isolation. If a soft foot compresses until the cabinet nearly touches the shelf, its useful damping falls sharply.
Furniture and Chairs: Wide pads spread concentrated leg loads and can stop a sofa from creeping. Chairs that must move daily work better with felt-bottom silicone caps; pure rubber can grab the floor so firmly that a chair tips rather than slides.
Cabinets and Drawers: Place rubber bumpers near the free corners, away from the hinge, to gain better leverage against impact. Pads that are too thick leave visible door gaps and may stop magnetic catches from engaging.
Cutting Boards: Mechanically fastened feet cope better with repeated washing than basic adhesive dots. Set a drill depth stop so the screw can’t break through the working face; a bench-top drill press helps keep shallow pilot holes straight.
Appliances and Machinery: Check static weight, vibration, heat, oil exposure, and thread dimensions. General-purpose bumpers aren’t replacements for rated leveling mounts or engineered isolators under compressors, pumps, or rotating workshop machines.
Outdoor Furniture and Planters: EPDM and compatible silicone formulations resist weather better than natural rubber. Pot feet should raise the base enough for drainage without making a tall planter unstable on rough paving.
Compare Rubber Foot Mounting Styles
Adhesive feet suit light objects on smooth surfaces, while screw-on, push-in, threaded, and press-fit designs provide stronger retention. Match the mounting geometry before comparing color, pack size, or shape.
Self-Adhesive Feet
Self-adhesive feet install without drilling and work well on clean metal, glass, finished wood, and smooth plastic. Sideways force is their weak point: a heavy enclosure dragged across a desk can make the adhesive creep while the rubber stays planted.
Acrylic adhesives often resist aging, heat, and UV better than basic rubber-based adhesives. Neither type bonds reliably to dust, polish, oily timber, rough powder coat, silicone, polyethylene, or polypropylene without suitable preparation.
Screw-On Feet
Screw-on feet give dependable retention on cases, cutting boards, furniture, and equipment that gets moved often. Measure the through-hole, counterbore, rubber thickness, screw-head diameter, and safe screw length before drilling.
Push-In Feet: These use a stem or barbs matched to a panel hole. Hole diameter alone isn’t enough; panel thickness and manufacturing tolerance determine whether the foot snaps in tightly or pulls loose.
Threaded Feet: Measure diameter, pitch, stud length, and adjustment range. M6 and 1/4-20 threads can look deceptively similar, and forcing one into the other damages the insert within a turn or two; see this guide to threaded inserts for secure wood and panel mounting.
Recessed Press-Fit Feet: These sit inside a counterbore or molded cavity for a clean, low profile. Measure recess diameter and depth with calipers; glue shouldn’t be used to hide an oversized or uneven recess.
Select the Right Rubber Material
No rubber compound performs best everywhere. Choose EPDM for weather, nitrile for petroleum oils, silicone for broad temperature exposure, and polyurethane where abrasion and load resistance matter more than soft cushioning.
Natural Rubber
Natural rubber offers high elasticity and grip, making it useful for indoor furniture and general-purpose feet. Sunlight, ozone, petroleum oil, and prolonged outdoor exposure age it faster; typical compound guidance is roughly -50°C to 70°C, subject to the manufacturer’s rating.
EPDM Rubber: EPDM resists water, steam, ozone, and weather, with some formulations rated from about -50°C to 150°C. It performs poorly around petroleum oils and hydrocarbon fuels, where swelling and softening may occur.
Neoprene
Neoprene provides balanced performance across weather, abrasion, flame, and limited oil contact. Typical service guidance falls near -35°C to 120°C, though formulation and continuous exposure change the usable range.
Nitrile Rubber: Nitrile, NBR, or Buna-N works well around petroleum grease and oil. It has weaker ozone and weather resistance than EPDM, making it a better fit inside workshops or machinery housings than on exposed garden furniture.
Silicone: Silicone remains flexible across broad temperature ranges, often around -60°C to 200°C for suitable formulations. It resists ozone and weather but can tear or abrade faster than tougher elastomers, and silicone residue can disrupt later painting or bonding.
TPE and Polyurethane: TPE supports efficient molding and a wide range of textures. Polyurethane handles abrasion and concentrated loads well, though harder grades feel slicker and less compliant than soft rubber.
Material Comparison: These ranges are reference values rather than universal limits. Compound recipe, hardness, load, exposure time, chemical concentration, and part geometry can change field performance.
| Material | Best trait | Main weakness | Typical use |
|---|---|---|---|
| Natural rubber | Grip and elasticity | Weather and oil | Indoor furniture |
| EPDM | Water, ozone, weather | Petroleum oil | Outdoor feet |
| Neoprene | Balanced resistance | Moderate specialist performance | Enclosures |
| Nitrile | Oil and grease | Outdoor ozone exposure | Workshop equipment |
| Silicone | Temperature and weather | Tear and abrasion | Clear bumpers, warm areas |
| Polyurethane | Wear and load | Less soft cushioning | Heavy-use equipment |
Ratings and Compliance: A generic material name doesn’t prove food-contact suitability, electrical insulation, flame performance, RoHS status, or ESD control. For food applications, rely on documentation for the exact compound and intended conditions rather than broad “food grade” wording; the FDA food-contact guidance explains the regulatory framework.
Measure Size, Load and Performance
Measure every mounting feature and calculate load per foot before ordering. Diameter alone doesn’t predict performance because height, profile, hardness, contact area, and compound affect compression and stability.
Rubber Foot Dimensions
For a round rubber foot, record base diameter, top diameter, height, hole diameter, and counterbore depth. For push-in models, add panel thickness and stem dimensions; threaded designs need diameter, pitch, stud length, base width, and adjustment range.
Load per Foot: Divide total supported weight by the number of feet carrying load. A 40 kg enclosure on four equally loaded feet places about 10 kg, or 98 N, on each foot because 40 × 9.81 ÷ 4 is approximately 98.
Real loads are rarely equal. A transformer, motor, drawer, or overhanging workpiece can shift the center of mass, so use manufacturer load-deflection data and a suitable safety margin for valuable or moving equipment.
Compression and Placement: Put feet near structural load paths instead of flexible sheet-metal corners. Four feet spread load well on flat surfaces; three always define a plane and often stop rocking, provided the triangular footprint remains stable.
Shore A Hardness
Flexible feet commonly use the Shore A scale: 30–40 feels soft, 50–60 is a medium general-purpose range, and 70–90 feels firm. These bands aren’t load ratings; ASTM lists ASTM D2240 as the standard test method for rubber hardness.
Grip and Friction: Traction changes with dust, water, polish, temperature, normal load, texture, and rubber formulation. A softer foot isn’t always less slippery; silicone furniture polish can turn a normally tacky pad into a smooth, skating surface.
Compression Set: This describes how much permanent deformation remains after sustained compression. High compression set causes lost clearance, uneven support, and greater vibration transfer after a foot sits loaded for months.
Damping Versus Isolation: Damping dissipates vibrational energy, while isolation limits transfer between a source and its support. Effective isolation depends on equipment mass, mount stiffness, deflection, and operating frequency; an ordinary bumper may quiet a rattle without isolating a motor.
Rubber Feet Product Options
Use these products as application-based options, not universal winners. Confirm dimensions, quantity, material, adhesive type, mounting method, and seller specifications before ordering because marketplace variants can change.
Electronics and Enclosures
These compact options suit small devices needing desk protection and grip; check foot height against ventilation and enclosure-clearance needs.

Compact Rubber Feet for Electronics
- Adds stable grip to small electronics
- Self adhesive backing installs quickly
- Helps prevent scratches on surfaces
- Reduces sliding and vibration
- Black finish blends discreetly
 Buy on Amazon

122 Mini Rubber Feet
- 122 piece pack for multiple applications
- Adds grip to compact electronics
- Adhesive backs make installation easy
- Helps reduce movement and vibration
- Protects desks shelves and countertops
Buy on Amazon
Cabinets and Drawers
Clear and black cabinet bumpers soften closing contact. Compare thickness carefully because a high pad can alter reveal lines, hinge position, and catch engagement.

Clear Cabinet Bumper Pads
- Softens cabinet and drawer closing
- Clear design stays nearly invisible
- Self stick application is simple
- Helps reduce knocks and noise
- Suitable for doors furniture and decor
Buy on Amazon

388 Clear Cabinet Bumpers
- Large 388 piece supply for home projects
- Cushions cabinet doors and drawers
- Clear silicone suits many finishes
- Self adhesive for fast placement
- Helps protect surfaces from impact
Buy on Amazon

318 Black Rubber Bumper Pads
- Generous assortment for repairs and projects
- Dampens noise from doors and drawers
- Helps keep glass and appliances stable
- Self stick pads apply with ease
- Black color offers a clean finished look
Buy on Amazon

Scotch Clear Cabinet Bumpers
- Trusted Scotch self stick design
- Cushions cabinet doors and drawers
- Clear round pads stay low profile
- Helps dampen closing sounds
- Protects surfaces from repeated contact
Buy on Amazon

200 Clear Silicone Door Bumpers
- 200 piece supply for cabinets and drawers
- Clear silicone blends into most surfaces
- Softens impact from closing doors
- Self adhesive dots install in seconds
- Useful for furniture and small projects
Buy on Amazon
Furniture and Planters: Choose by leg shape, floor finish, supported load, and whether the item should grip or slide. Planter feet must distribute pressure across the pot base rather than concentrate it beneath a thin ceramic edge.

Yelanon Non Slip Furniture Pads
- Helps keep furniture from sliding
- Adds traction under couch and chair legs
- Self adhesive for convenient setup
- Helps protect hardwood floors
- 56 piece pack supports multiple rooms
Buy on Amazon
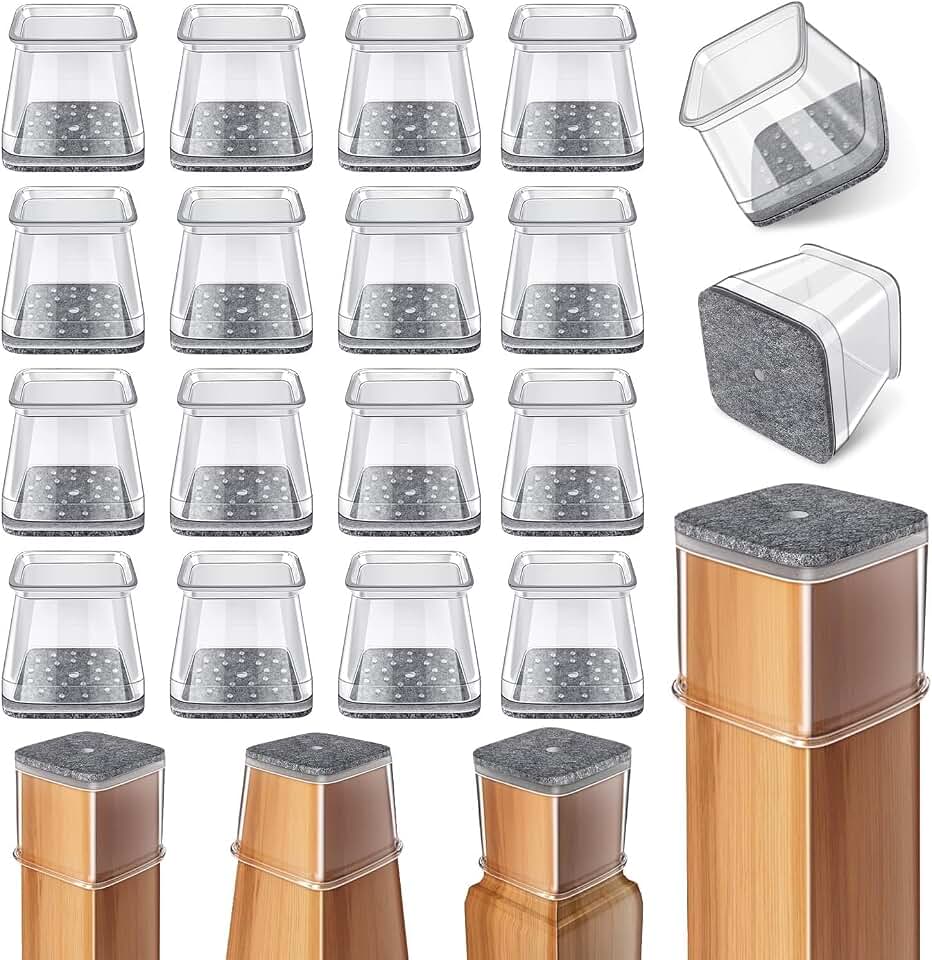
Square Chair Leg Floor Protectors
- Fits square furniture legs within the listed range
- Silicone caps grip securely around legs
- Felt bases help protect hardwood floors
- Helps chairs move with less scraping
- 24 piece pack covers multiple chairs
Buy on Amazon
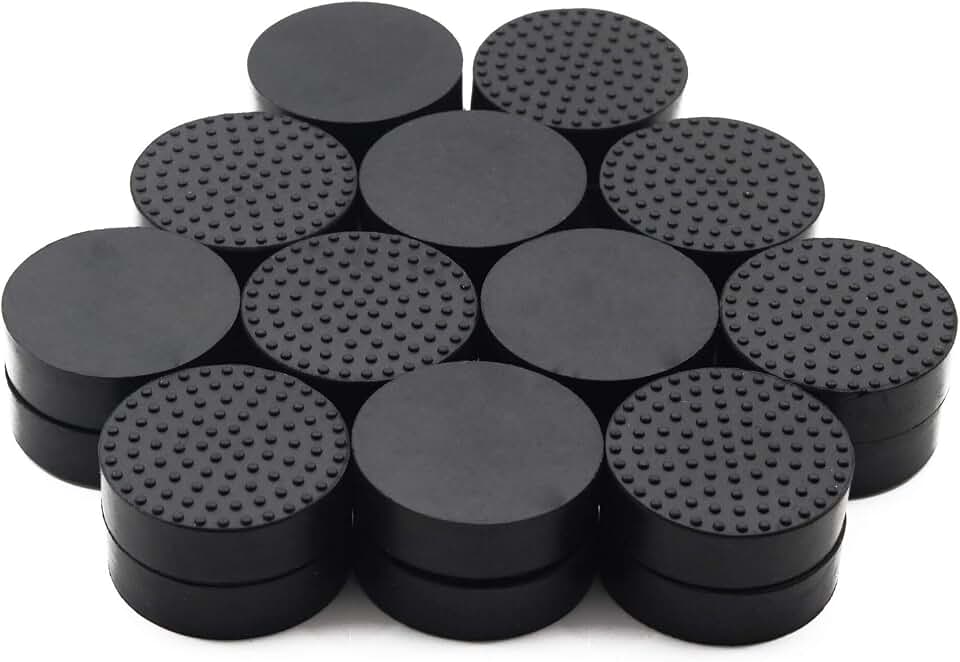
Invisible Non Slip Pot Feet
- Raises planters slightly above surfaces
- Enhanced grip helps keep pots steady
- Helps improve airflow beneath containers
- Suitable for indoor and outdoor planters
- Invisible design keeps focus on your plants
Buy on Amazon
Verify Product Claims: Don’t infer load capacity, outdoor life, food-contact status, electrical insulation, ESD control, or certified isolation from listing photos. Check the selected variant because dimensions, pack counts, and materials may differ within one product page.
Install Rubber Feet Correctly

Successful installation starts with clean surfaces and accurate placement. Adhesive feet need pressure and bond-building time, while screw-on and threaded feet need correct pilot holes, internal clearance, and controlled tightening.
Adhesive Surface Preparation
Remove dust, wax, grease, polish, and loose paint. On compatible surfaces, a roughly 50:50 mixture of isopropyl alcohol and water is common preparation for pressure-sensitive adhesive; test finishes in a hidden area and let the surface dry fully.
Placement and Bonding: Mark every position before exposing the adhesive. Avoid touching the sticky face, press firmly over the whole foot, then keep the object stationary while the bond develops.
Some acrylic systems reach roughly 50% bond in 20 minutes, 90% after 24 hours, and full bond after 72 hours under suitable conditions, according to 3M adhesion guidance. Use the instructions supplied with the actual pads, since generic adhesives differ.
Difficult Surfaces: Textured powder coat, oily wood, silicone, polyethylene, polypropylene, masonry, and flaking paint resist common adhesives. A compatible primer may help certain plastics, but mechanical attachment is the safer long-term workaround.
Screw-On Installation
Check the reverse side before drilling, use a suitable pilot size, and fit a depth stop on thin material. Tighten until the foot sits securely, then stop; crushed rubber bulges around the screw and often splits later.
Threaded Installation: Confirm metric or imperial pitch with a gauge or known fastener. Use a locknut after leveling and confirm that every foot carries load rather than spinning one foot down merely to hide a warped base.
Final Safety Checks: Look for exposed screw tips, wire contact, blocked vents, cracked rubber, loose fasteners, and reduced door clearance. Preserve grounding and insulation arrangements in electrical enclosures.
Diagnose Common Rubber Foot Failures
Most failures come from surface contamination, wrong sizing, chemical incompatibility, uneven loading, or excessive compression. Replacing a failed foot with the same type rarely fixes the cause.
Adhesive Feet Detach
Dust, oil, immediate loading, heat, rough coating, and sideways shear make adhesive feet detach. Remove the old residue, clean the surface, allow full bond-build time, or switch to screw-on feet if the object gets dragged.
Feet Keep Sliding: Clean both contact surfaces before buying replacements. If the dry pad still slides, increase footprint, choose a purpose-rated non-slip compound, and move the feet closer to the actual load paths.
Rubber Leaves Marks: Carbon black, oils, plasticizers, and abrasion can transfer onto pale floors. Select products labeled non-marking, test beneath the object, and inspect periodically for trapped grit or moisture.
Feet Flatten or Split
Flattening points to excessive load or high compression set; splitting often follows overtightening, ozone cracking, sharp screw heads, or oil exposure. Increase diameter, select a load-resistant compound, and use a washer where the fastener cuts into the rubber.
Furniture Rocks: Check actual foot height with calipers and test the floor with a straightedge. Adjustable feet solve changing floor levels better than stacked adhesive pads, which feel spongy and tend to creep sideways.
Adhesive Removal: Lift an edge with a plastic scraper and use mild heat only if the finish tolerates it. Apply a compatible residue remover sparingly, test it out of sight, and avoid metal blades on lacquer, veneer, and soft plastic.
Practical Notes From Real-World Use: New pads often feel clean and slightly tacky, yet a thin gray film of workshop dust can remove most of that grip within days. Cleaning the contact face with the approved method often restores traction without replacement.
A common beginner mistake is drilling all four holes before testing placement. Fit one foot, check screw depth and internal clearance, then use a simple drilling jig for the remaining positions; a stable workbench setup also prevents the workpiece from shifting.
Rubber Feet Buying Checklist
Before buying rubber feet, verify fit, function, environment, attachment, documentation, and actual cost. Pack quantity has little value if most pieces don’t match the required dimensions.
Fit and Dimensions
- Measure diameter or width, height, profile, and required clearance.
- Confirm hole diameter, counterbore, recess, panel thickness, or thread pitch.
- Check vents, doors, battery covers, drain holes, and internal components.
- Measure all replacement positions rather than copying one worn foot.
Intended Function: Decide whether grip, impact cushioning, floor protection, ventilation clearance, leveling, easy movement, or vibration reduction is the priority. One foot rarely performs every function equally well.
Environmental Exposure
- Check for sunlight, ozone, water, freezing, and temperature cycling.
- Identify petroleum oil, grease, solvents, and cleaning chemicals.
- Request documented food-contact or electrical properties where applicable.
- Use non-marking compounds on pale or porous flooring.
Attachment Method: Adhesive suits light-duty objects on smooth, clean surfaces. Mechanical attachment is usually more dependable under heat, moisture, heavy loads, repeated movement, or long service periods.
Product Documentation: Look for a dimensional drawing, named compound, Shore hardness, temperature range, adhesive type, load-deflection data, and applicable compliance statements. Unknown material and vague “heavy duty” wording make repeat purchasing difficult.
Cost per Usable Foot: Divide total delivered cost by the number of feet in the required size. A 300-piece assortment costing $15 equals five cents per listed piece, but if only 20 fit, the useful cost is 75 cents each.
Buy the smallest pack that covers installation plus a few matching spares, or choose a documented industrial part for repeatable supply. Correctly sized rubber feet cost less over time than adhesive pads that detach, flatten, stain, or need regular replacement.
FAQs
What Are Rubber Feet Used For?
Rubber feet protect surfaces, prevent slipping, and help keep equipment stable. They are commonly added to furniture, electronics, appliances, tools, and display items. They can also reduce noise when an object is moved or placed on a hard surface.
Do Rubber Feet Reduce Vibration?
Yes, rubber feet can reduce vibration by absorbing some movement between an object and its supporting surface. They help limit rattling, noise, and minor shifting from devices such as speakers, appliances, and machinery. Thicker or softer rubber feet usually provide better vibration damping.
How Do You Attach Rubber Feet Securely?
Rubber feet attach most securely to a clean, dry, smooth surface using the correct adhesive or mounting method. Remove dust, oil, and moisture before applying adhesive-backed feet, then press firmly for several seconds. For heavier items, use screw-mounted feet or a strong industrial adhesive.
Can Adhesive Rubber Feet Be Used Outdoors?
Adhesive rubber feet can be used outdoors if they are rated for weather, moisture, and temperature changes. Choose UV-resistant rubber with a waterproof adhesive for the best results. Clean the surface thoroughly and avoid applying them during very cold, wet, or humid conditions.
How Do I Choose Rubber Feet That Will Not Mark Hardwood?
Choose non-staining, non-migrating rubber feet specifically labeled safe for hardwood floors. Avoid dark or low-quality rubber, as it can leave marks or react with floor finishes over time. Clear silicone, felt-backed pads, and light-colored thermoplastic feet are often safer options.


