


Peg board hooks must match the panel’s hole diameter, spacing, thickness, rear clearance, and attachment style. Choose the shortest hook that supports the tool securely, then check retention and published load ratings before buying a set.
Table of Contents
How to Choose Peg Board Hooks
The right pegboard hooks fit the board fully, hold each item close to the panel, and stay seated when the item is removed. A hook that passes through a hole may still be loose, poorly supported, or incompatible with the panel behind it.
Compatibility Checklist
Check the complete installation rather than trusting a “universal” label. Use this buying checklist before comparing pack quantities:
- Identify hardboard, steel, plastic, or another panel material.
- Measure the hole diameter and center-to-center spacing.
- Measure panel thickness rather than relying on its nominal size.
- Check the open space behind the panel.
- Confirm round-hole, slotted, or proprietary attachment geometry.
- Compare hook wire diameter and upper-leg shape.
- Look for compatible locking clips or built-in retainers.
- Verify any load rating for the complete installed system.
Hole Size and Spacing
Consumer hardboard commonly has nominal 1/8-inch or 1/4-inch holes, often arranged on about one-inch centers. Measure from the center of one hole to the center of the next; measuring the open gap produces the wrong spacing figure.
| Panel detail | What to measure | Common buying mistake |
|---|---|---|
| Hole diameter | Inside edge to inside edge | Confusing hole size with hook wire size |
| Hole spacing | Center of one hole to the next | Measuring only the gap |
| Panel thickness | Front face to rear face | Assuming nominal and actual sizes match |
| Hook projection | Panel face to usable tip area | Buying by overall wire length |
A small hook marketed for both sizes can feel sloppy in a 1/4-inch hole, producing a faint metallic click whenever a tool moves. Retaining clips may control that movement, but a hook intended for a 1/4-inch opening usually won’t enter a 1/8-inch opening.
Thickness and Rear Clearance
Conventional hooks need enough rear clearance for the bent upper leg to pass through, rotate, and settle against the panel. Pegboard mounted flat to drywall can block that movement, making a compatible hook appear too short or wrongly bent.
Use furring strips, spacers, or the panel maker’s frame system. Don’t force a hook that scrapes the wall; the gritty resistance means its rear leg can’t seat, and forcing it may chip hardboard around the hole.
Load, Leverage, and Ratings
There is no universal weight limit for a pegboard hook. Capacity changes with panel material, hook shape, fasteners, wall structure, engagement depth, and the distance between the load and the panel.
Bending moment equals load force multiplied by distance from the panel.
Basic mechanical relationship
A five-pound item centered six inches from the panel creates about three times the bending moment of the same item centered two inches away. Longer reach creates greater leverage, not an automatic increase in capacity.
Treat “heavy duty” as advertising unless the manufacturer names the panel, load position, mounting method, and numeric rating. Safety-sensitive storage for power tools should use the maker’s rated configuration rather than a home destructive test.
Cost Per Usable Hook
Compare practical cost per hook by dividing the delivered price by the number of hooks you expect to use. A 278-piece kit may count bins, labels, anchors, caps, and retaining clips as separate pieces.
Record the actual hook count, useful sizes, included storage parts, shipping charge, replacement availability, and warranty. A smaller kit can offer better value when most pieces in a large assortment would remain in the box.
Peg Board Hook Types and Sizes
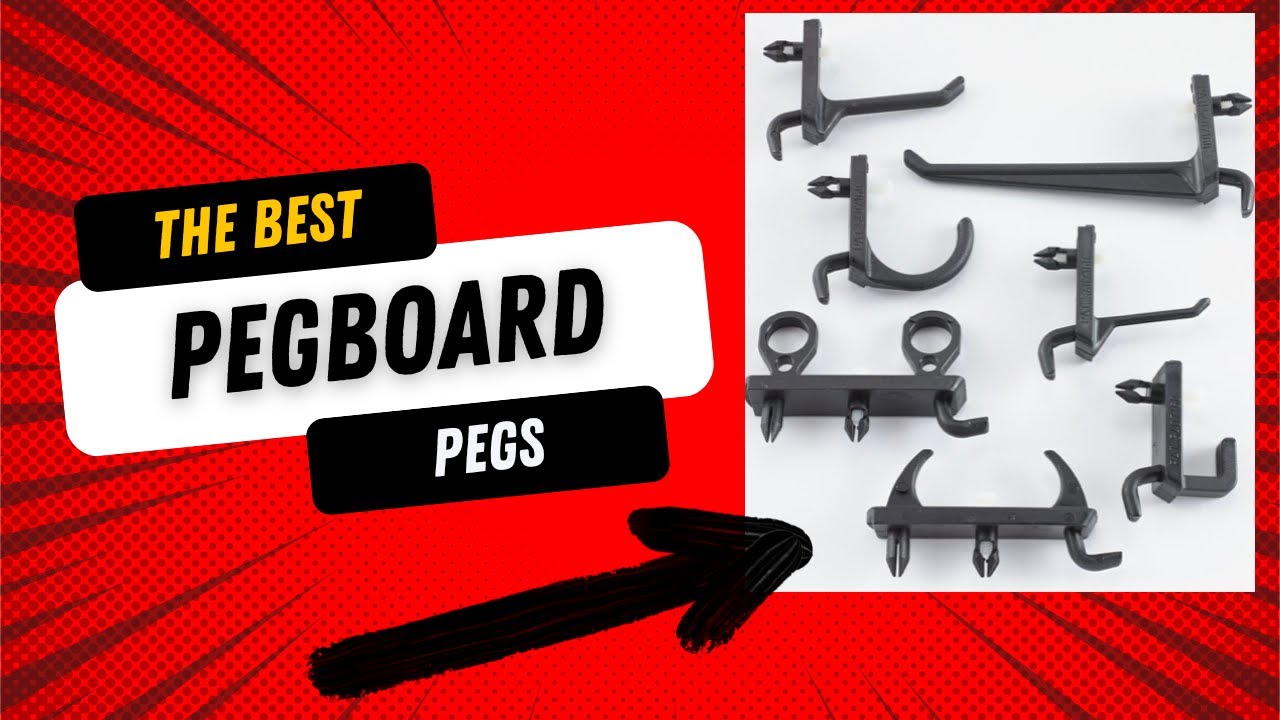
Hook shape should match the object’s hanging point, width, depth, and removal motion. Short hooks suit compact hand tools, while paired or curved tool holders control wide and irregular equipment.
J, Straight, and L-Hooks
J-hooks work well for scissors, wrenches, tape, and tools with hanging holes. Straight and L-shaped hooks hold packaged supplies, narrow coils, and several light items, but smooth objects can slide from a level tip.
Double-Arm and Utility Hooks
Double-arm hooks add lateral stability for mallets, drills, hoses, and wide handles. Deep utility curves reduce roll-off, though both arms must engage correctly and share the load instead of twisting against one hole.
Tool Holders and Rings
Pliers racks, screwdriver strips, and circular holders keep related tools visible without crowding neighboring hooks. Measure handle width, shaft length, and ring diameter; thick insulated grips often won’t fit holders made for slim handles.
| Hook or holder | Useful for | Main limitation |
|---|---|---|
| J-hook | Wrenches, scissors, keyed tools | Lifts out during upward removal |
| Straight hook | Tape, packaged parts, light coils | Items can slide from the tip |
| Double-arm hook | Wide tools, drills, mallets | Requires aligned engagement points |
| Utility hook | Cords, hoses, irregular handles | Uses more panel area |
| Ring holder | Cups, bottles, round tools | Object may drop through an oversized ring |
| Tool rack | Screwdrivers, files, pliers | Handle and shaft clearance varies |
Two-Inch Hooks
Two-inch hooks keep compact tools close to the board and reduce leverage. They suit keys, small pliers, sanding discs, and narrow supplies in tight work areas where projecting steel could catch a sleeve.
Four-Inch Hooks
Four-inch hooks provide moderate depth for tape rolls, coiled leads, and small packages. Choose an upturned tip where items can creep forward as nearby tools are removed.
Six-Inch Hooks
Six-inch hooks hold deeper supplies or several light items, but loads near the tip create high leverage. Keep heavy objects near the panel and avoid placing a long bare hook at face or eye height.
Tips and Protective Caps
Upturned ends resist sliding, while rubber or plastic caps cover sharp wire and prevent scratches. A soft cap feels slightly tacky against a polished handle, yet protective caps add no structural strength and may loosen in a hot garage.
Peg Board Hook Sets by Use Case
Choose a set by the hooks and accessories your layout will use, not its advertised piece count. Mixed kits suit a new installation; single-length packs suit an established layout with a known storage pattern.
Product Comparison Checklist
A useful product comparison records the details below before price is considered. Missing measurements create more trouble than a small difference in pack cost.
- Actual number of functional hooks.
- Hook types and usable projection lengths.
- Wire diameter and finish.
- Compatible hole sizes and panel materials.
- Locking clips or built-in retainers.
- Bins, baskets, caps, and mounting parts.
- Published load rating and test configuration.
- Warranty and availability of matching replacements.
Claims to Verify
Verify claims such as “universal” and “rustproof”, plus statements that hooks fit both 1/8-inch and 1/4-inch panels. Check whether “supports power tools” refers to one hook, a pair, or a complete panel system.
Complete Organizer Kit
The INCLY kit suits a new garage or craft wall that needs hooks and bins in one package. Its stated 278-piece count includes assorted components, so inspect the contents list to find the true hook count and verify compatibility with your panel.

INCLY Complete Pegboard Kit
- Generous 278-piece organizing set
- Assorted hooks suit many tools
- Includes bins for small supplies
- Fits one eighth and one quarter inch pegboards
- Creates flexible wall storage
 Buy on Amazon
Multi-Size Hook Set
The ELEAD set offers 2-, 4-, and 6-inch hooks for items with different depths. Select the shortest safe length for each object, and don’t treat the supplied “heavy duty” wording as a numeric rating.

ELEAD Multi Size Hook Set
- 66 pieces for flexible organizing
- Includes two four and six inch hooks
- Fits one eighth and one quarter inch pegboards
- Heavy duty hooks store assorted tools
- Organizes garages workshops and crafts
Buy on Amazon
Long-Reach Hook Set
The Neiko pack contains fifty six-inch hooks for cords, tape rolls, packaged supplies, and craft materials. Keep concentrated weight away from the tip because long reach increases bending force at the board.

Neiko Six Inch Hook Kit
- Fifty pack of six inch hooks
- Longer reach for hanging tools
- Helps free up shelf and bench space
- Useful for garage and craft storage
- Creates accessible wall organization
Buy on Amazon
Prices and Inventory in 2026
Prices and inventory checked in 2026 can change by seller, delivery location, coupon, and package revision. Recheck the listing, shipping fee, piece breakdown, and model number before ordering; similar product titles may hide different contents.
Pegboard on a Workbench
A pegboard on workbench storage works best when common tools sit inside comfortable reach and heavy items stay low. Leave open space for lighting, outlets, chargers, vises, and machines that project above the bench.
Placement and Reach
Place frequently used hand tools between shoulder and bench height, without requiring a stretched wrist or raised elbow. The NIOSH ergonomics guidance supports reducing awkward reaches and repeated strain; store rarely used tools outside the prime reach zone.
Keep precision tools away from grinding grit, paint mist, and metal chips. Fine dust feels chalky on caliper slides and can work into adjustment threads, so closed storage may suit measuring equipment better than an exposed hook.
Workflow-Based Tool Zones
Group tools by measuring, cutting, fastening, electrical work, sanding, and cleaning. Tool silhouettes or labels speed up return, while some unused panel space allows later changes without rebuilding the whole arrangement.
Keep clamps near assembly work and compare holder shapes with this guide to types of clamps. Store bulky machine aids nearer their machines, such as frequently used table saw accessories.
Above-Bench Installation
Fasten the panel into studs, rails, or anchors rated for the wall and expected load. Set the bottom edge high enough that hanging shafts don’t strike projects, yet low enough to avoid an overhead reach.
Rear clearance, lighting, and bench depth should be planned together. For broader layout choices, see the guide to workbenches before fixing the panel height.
Workbench Safety
Never suspend a tool by its cord, trigger, battery release, or fragile plastic edge. Cover blades, point sharp tips away from the user, and use two-point support for long tools that can swing.
Check the sweep of cabinet doors, drill-press handles, and long stock before filling the wall. A dedicated drill press table may need more side clearance than its footprint suggests.
Everyday Workbench Kit
The INCLY Essentials Kit is a moderate mixed set for hand tools and small supplies. Its listed 120 pieces include assorted hooks and bins; confirm the number of each component and test one hook before arranging the full bench.

INCLY Pegboard Essentials Kit
- 120 pieces for everyday organizing
- Assorted hooks hold common tools
- Storage bins organize small parts
- Fits one eighth and one quarter inch pegboards
- Ideal for garages and workbenches
Buy on Amazon
Pegboard Shelves and Accessories
Use hooks for objects with secure hanging points and a pegboard shelf for chargers, containers, bottles, and small organizers. Baskets and bins suit loose parts that would be awkward or unsafe on a single hook.
Hooks Versus Shelves
Hooks provide fast identification and one-handed access while using little panel area. Shelves support objects without hanging holes, but their forward projection creates leverage and makes load placement more significant.
Shelf Compatibility
Match brackets to the panel’s hole or slot design, thickness, and maker’s attachment pattern. Generic hardboard brackets shouldn’t be fitted to a proprietary steel panel without written compatibility confirmation.
Shelf Load Management
Use the required number of brackets, distribute weight, and position heavy objects close to the panel. Front-edge loading creates greater bending force and can distort holes while the shelf board still appears straight.
Screw or clip the shelf to its brackets where attachment points are supplied. Place liquids in a shallow tray because a slow leak can soften unsealed hardboard before a dark stain or swollen surface becomes visible.
Shelf Measurements
Record shelf width, depth, material thickness, bracket spacing, engagement points, front-lip height, and rated distributed load. Measure the object too; charger cables and bottle caps often need more vertical clearance than the body suggests.
Bins, Baskets, and Racks
Bins hold screws, washers, bits, and sanding parts, while wire baskets support irregular supplies. Label the front and set a fill limit; mixed fasteners become hard to identify once metal dust coats them in the same dull gray.
Tool racks work well for screwdrivers, pliers, and files when their openings match handle and shaft sizes. Small workshop hardware, including spare threaded inserts, belongs in labeled bins rather than open hooks.
Roll and Magnetic Holders
Roll holders suit paper towels, tape, wire, labels, and ribbon when spindle diameter and replacement clearance match the roll. Magnetic holders can work on steel panels, but magnetic grip changes with coating thickness, contact area, steel composition, and pull direction.
Hooks for Metal Pegboard
Regular hooks fit a metal pegboard only when its manufacturer approves the hole shape, spacing, and engagement geometry. Some metal peg boards accept conventional hooks, while slotted systems require matching tabs or proprietary accessories.
Metal Versus Hardboard
Steel panels resist moisture and localized hole deformation better than common hardboard, while hardboard costs less and cuts easily. Material alone doesn’t establish capacity; steel gauge, folded edges, mounting points, wall fasteners, and panel span control the installed result.
| Feature | Hardboard pegboard | Metal pegboard |
|---|---|---|
| Moisture response | Can swell or soften if unsealed | Resists moisture but scratched steel may corrode |
| Modification | Easy to cut with woodworking tools | Cutting may damage the finish or panel bends |
| Accessory format | Often conventional round-hole hooks | Round holes, slots, or proprietary tabs |
| Hole deformation | Fiber around holes can crush | Depends on steel gauge and formed profile |
| Magnetic use | Not magnetic | Possible on suitable steel surfaces |
Conventional Hook Compatibility
Check whether the maker permits standard 1/4-inch peg hooks and whether a retaining clip is required. Powder coating can narrow an opening enough to make an otherwise suitable hook feel tight and scratchy during insertion.
Slotted and Proprietary Systems
Slotted panels may use downward-locking tabs, screws, or combined slot-and-hole accessories. Mixing brands can leave one tab floating above the panel, which concentrates the load and defeats the intended locking action.
Corrosion and Finishes
Zinc plating and powder coating offer practical protection in garages and sheds, but scratches can expose steel. Inspect areas where tools rub; reddish dust, bubbling paint, or a rough edge signals finish damage that needs cleaning and repair.
Metal Panel Installation
Follow every mounting point named by the panel maker rather than fastening only the corners. A high-rated panel can still pull away when screws miss studs, anchors are undersized, or the wall material can’t carry the combined load.
Magnetic Accessory Limits
Test magnets with the intended object close to the bench before placing them overhead. Magnets resist direct pull better than sliding in many setups, so vibration or an off-center load may cause a holder to creep downward.
Securing and Installing Pegboard Hooks
Secure hooks by mounting the panel with full rear clearance, seating each hook completely, and adding compatible retainers where removal lifts the hook. Installation quality matters more than how firmly a loose hook is pushed into a damaged hole.
Mount and Space Panels
Locate studs or install rated anchors, mark a level frame, and provide the maker’s required rear gap. Wear eye protection while drilling; the OSHA hand and power tools guidance covers common tool hazards and protective practices.
Seat Hooks Correctly
Insert the upper leg, rotate the hook into place, and press its lower contact point against the panel. A correctly seated hook feels stable rather than springy; scraping behind the board points to insufficient clearance.
Locking Clips and Hooks
Plastic or metal clips reduce lift-out by pinning the hook against the panel face. Match the clip to the hole size, board thickness, and wire diameter; an overstretched clip may turn white, crack, or lose its grip.
Cable Tie Retainers
A cable tie offers a low-cost, semi-permanent retainer when a purpose-made clip isn’t available. It prevents rearrangement until cut and doesn’t increase capacity, so never use it to compensate for a weak panel or overloaded hook.
Correct Tool Removal
Lift the tool clear of the upturned tip, then pull it forward without pushing the hook upward. Use two hands for deep or awkward objects; twisting a heavy tool sideways can dislodge the hook beside it.
Power Tool Storage Safety
Support power tools by a strong handle or maker-approved holder, never by the cord, trigger, battery latch, or guard. Remove batteries where appropriate and keep the tool’s center of mass close to the panel.
Use paired supports for long or top-heavy tools and check that removing one item can’t knock another loose. Expensive tools are better on a rated shelf or dedicated bracket when no hook rating is available.
Inspect Wear and Deformation
Inspect hooks and holes after layout changes, impacts, or periods of heavy use. Replace bent wire, cracked clips, enlarged holes, loose fasteners, swollen hardboard, and steel parts showing active corrosion.
Practical Notes From Real-World Use
The most common failure isn’t a hook snapping; it’s the hook following the tool off the wall. This happens with scissors, tape rolls, and handled tools because their removal motion applies an unnoticed upward force.
Test a layout by loading one example of each tool, leaving it overnight, then removing it ten times using a normal working motion. Watch for rotation, chipped fibers, shiny rub marks, loosened clips, and any permanent sag.
For a useful comparison, record panel thickness, hook diameter, projection, tool weight, and distance to the tool’s center of mass. Photograph the unloaded and loaded hook from the side; small changes are easier to spot against a fixed reference line.
Closely packed tools often collide before the hooks reach their load limit. Leave finger room around pliers and wrenches, plus enough vertical clearance that a lifted tool doesn’t catch the hook above it.
Don’t publish a destructive test as a safe working load. A hook that survives once may have yielded slightly, while repeated loading, vibration, humidity, and careless removal can produce failure at a much lower weight.
Peg Board Hooks FAQs
Peg board hook questions usually concern compatibility, size, capacity, lift-out, and metal panels. The answers depend on the entire installed system rather than the hook alone.
Are Hooks Universal?
No. Pegboard hooks aren’t universal because hole diameter, spacing, panel thickness, rear clearance, wire geometry, and round-hole or slotted attachment systems vary. Check the panel and hook specifications together.
Which Hook Size Fits?
Many consumer boards use nominal 1/8-inch or 1/4-inch holes on about one-inch centers, but measure the actual panel. Choose a compatible wire size and the shortest projection that holds the item securely.
Some small hooks are sold for both hole sizes and may sit loosely in larger openings. A compatible locking clip can reduce movement, while a 1/4-inch hook usually won’t enter a 1/8-inch hole.
What Weight Can Hooks Hold?
There is no single safe weight for all pegboard hooks. Use the manufacturer’s rating for the named hook, panel, fasteners, wall structure, installation pattern, and load position; moving a load farther forward increases bending moment.
Why Do Hooks Fall Out?
Hooks fall out when tool removal pushes them upward, or when loose sizing, missing retainers, poor rear clearance, and worn holes reduce engagement. Seat the hook fully, fit a compatible retainer, and lift tools clear before pulling forward.
Do Hooks Fit Metal Boards?
Some conventional hooks fit metal boards, but only where the panel maker confirms compatibility. Slotted and proprietary metal peg boards may require their own locking accessories, even when a standard hook appears to enter the opening.
FAQs
Are All Pegboard Hooks Universal?
No, pegboard hooks are not all universal because pegboards use different hole sizes, spacing, and materials. Most standard hooks fit 1/4-inch holes spaced 1 inch apart, but smaller 1/8-inch pegboards need matching hooks. Always check your board’s hole diameter and spacing before buying accessories.
What Size Hooks Fit Standard Pegboard?
Standard pegboard usually uses hooks designed for 1/4-inch holes spaced 1 inch apart. These hooks are common in garages, workshops, and retail displays. Some lightweight boards use 1/8-inch holes instead, so measure the hole diameter or review the manufacturer’s specifications before choosing hooks.
How Much Weight Can A Pegboard Hook Hold?
A typical pegboard hook can hold about 2 to 10 pounds, depending on its length, thickness, mounting style, and the pegboard itself. Short, sturdy hooks installed in a reinforced board hold more securely than long hooks in thin hardboard. Distribute heavy tools across several hooks and follow the board manufacturer’s weight limits.
How Do You Keep Pegboard Hooks From Falling Out?
You can keep pegboard hooks from falling out by using locking hooks, pegboard hook clips, or plastic retainers. These accessories secure the hook to the board and prevent it from lifting out when you remove a tool. For a permanent setup, small zip ties or adhesive-backed retainers can also help.
Can Regular Pegboard Hooks Be Used On Metal Pegboard?
Regular pegboard hooks can be used on metal pegboard if the hole size and spacing match the hooks. Many metal boards use standard 1/4-inch holes, making common hooks compatible. However, some metal systems have proprietary slots or reinforced holes, so use the manufacturer’s accessories when standard hooks do not fit securely.


