


Wood glue is a broad group of adhesives used to bond wood fibers, and no single formula suits every project. Choose PVA for tight indoor joints, exterior-rated PVA for weather exposure, CA for small fast repairs, epoxy for controlled gap filling, and hide glue for reversible work.
The best adhesive depends on joint fit, moisture exposure, working time, materials, and future repair needs. This guide compares the main types, project uses, costs, application methods, failure signs, and safety limits.
Table of Contents
Wood Glue at a Glance
What Wood Glue Is
Wood glue is any adhesive for wood, but products sold under that name may use PVA, polyurethane, cyanoacrylate, epoxy, or animal-protein chemistry. These formulas cure in different ways, tolerate different gaps, and respond differently to water, heat, movement, and impact.
Ordinary yellow or white woodworking glue is usually PVA adhesive. It forms its best bond between clean, absorbent, close-fitting faces; paint, wax, dust, old glue, and oily residue can keep it from gripping the fibers.
A well-made joint may break in the surrounding wood rather than along the glue line. That result shows strong local adhesion, but it doesn’t prove that the joint will resist water, creep, or shock in another project.
Quick Selection Table
The best glue for wood is a conditional choice. Start with the project conditions in this table, then check the exact bottle’s temperature, exposure, cure, and substrate specifications.
| Project or condition | Preferred adhesive | Why it fits | Main limitation |
|---|---|---|---|
| Indoor furniture | PVA or aliphatic resin | Strong, simple, and easy to clean while wet | Needs close-fitting bare wood |
| Exterior furniture | Type I-rated or approved exterior PVA | Resists repeated wetting better | Doesn’t waterproof the wood |
| Small crack or inlay | Thin or medium CA | Fast fixture and good penetration | Brittle under impact |
| Irregular repair | Epoxy | Fills limited gaps without relying on foam | Requires accurate mixing |
| Antique repair | Hide glue | Can be reversed with controlled heat and moisture | Low water resistance |
| Wood to metal | Epoxy or compatible polyurethane | Bonds unlike materials | Surface preparation controls success |
| Temporary jig positioning | CA with a suitable positioning method | Fixtures in seconds | Heat and brittle failure are possible |
| Building structure | Code-approved structural adhesive | Rated for defined construction loads | Furniture glue isn’t a substitute |
Key Decision Factors
Choose by exposure and fit before comparing advertised strength. A lower-strength product in a tight, properly prepared joint often outlasts a high-strength formula spread over dirty wood or a wide gap.
- Use PVA when bare wood faces meet closely and water exposure matches the product rating.
- Use epoxy for limited irregularities, oily species after testing, or wood-to-metal repairs.
- Use CA where fast positioning matters more than shock resistance or long working time.
- Use hide glue when a future repairer may need to separate the joint.
- Use a listed structural system for load-bearing building work.
Practical notes from use: a correct glue film feels slick under assembly pressure and produces a narrow, continuous bead along the seam. Dry patches, sudden grabbing, or one clamp carrying most of the load signal that the glue-up should be stopped before the adhesive sets.
Complex assemblies need enough working time to seat every joint without frantic hammering. A slower PVA or epoxy can be safer than fast glue when fitting a cabinet carcass, while CA makes sense for a tiny chip that must remain still immediately.
Wood Glue Types Compared
PVA is the default woodworking adhesive, while polyurethane, CA, epoxy, hide glue, and construction products solve narrower problems. The differences involve curing chemistry, gap tolerance, flexibility, cleanup, exposure rating, and reversibility rather than strength alone.
PVA and Aliphatic Resin
PVA wood glue cures as water leaves the film and polymer particles form a continuous bond. Yellow aliphatic-resin formulas are modified PVA products commonly chosen for furniture because they spread easily, have little odor, clean with water while wet, and sand predictably after curing.
PVA performs poorly as a structural gap filler. A thick layer may look solid after drying, yet it carries load less effectively than a thin film between accurately fitted faces and may creep under sustained heat or stress.
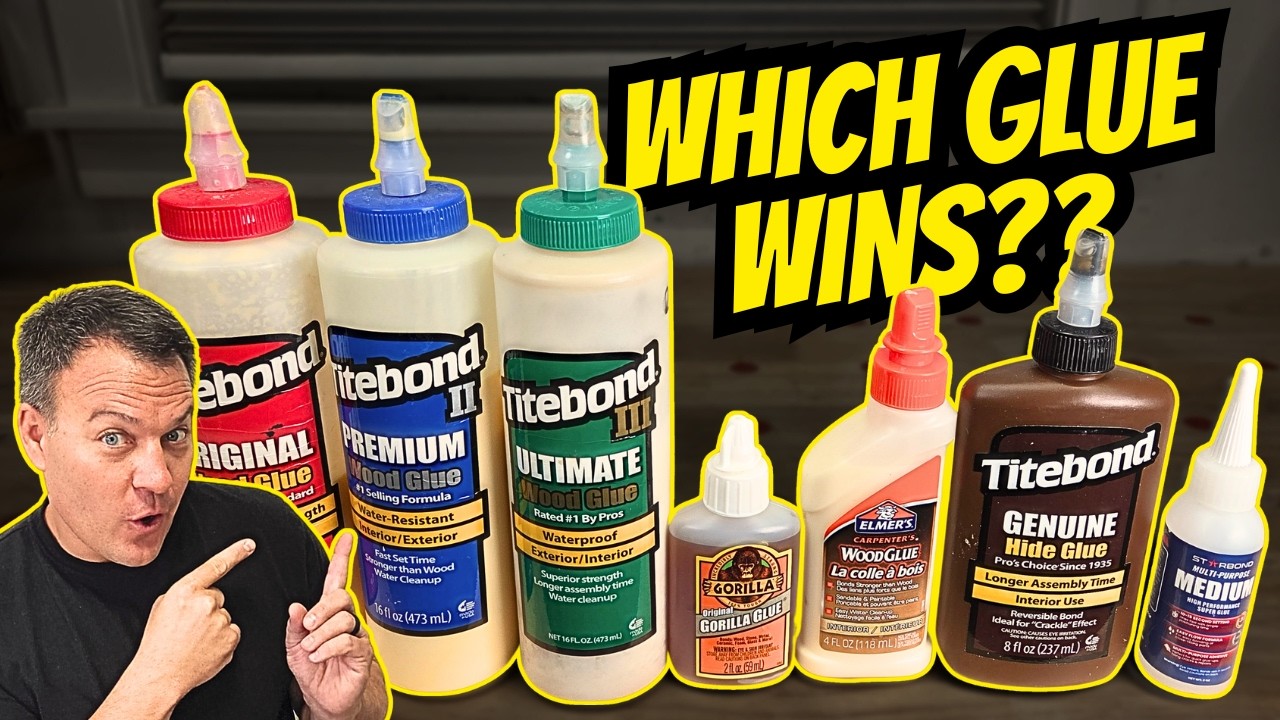
Titebond Original, Titebond II, Titebond III, Elmer’s Carpenter’s Wood Glue, and Gorilla Wood Glue sit within this broad family, but their exposure ratings and assembly times differ. Never choose from brand color alone; read the formula name and technical sheet.
Polyurethane Adhesive
Moisture-curing polyurethane bonds wood to several porous and nonporous materials and often carries an exterior-use claim. A light mist may be required on very dry material, but too much moisture can increase uncontrolled foaming.
The expanding brown foam feels crisp and airy after curing; it isn’t dense structural material. Polyurethane can bridge visual gaps, yet the foam has little strength, so repair wide voids with fitted wood or epoxy rather than trusting expansion.
Original Gorilla Glue polyurethane and water-based Gorilla Wood Glue are different chemistries. They require different cleanup methods, moisture conditions, and handling practices, despite sharing a brand name.
CA and Starbond CA Glue
Cyanoacrylate, or CA, polymerizes quickly in the presence of trace moisture. Thin CA wicks into hairline cracks, medium viscosity handles small repairs, and thick CA allows slightly more positioning time while filling minor surface irregularities.
Starbond CA glue products such as EM-02, EM-150, and EM-2000 cover thin, medium, and thicker applications. Woodturners use them for crack stabilization and glossy built-up finishes, while jig makers use precision tips and accelerator for quick fixture work.
Accelerator shortens fixture time but can create heat, a more brittle bond, or white frosting around the joint. Apply the smallest useful amount, provide fresh air, and test accelerator on finished or pale wood before treating visible work.
CA isn’t a direct substitute for PVA in chair rails, tabletops, or large mortise-and-tenon joints. Its short open time offers little chance to correct alignment, and a sharp impact can fracture a hard, brittle glue line.
Epoxy for Wood
Two-part epoxy combines resin and hardener to form a cured thermoset adhesive. It works well for limited gap filling, irregular restoration work, and bonds between wood and metal, ceramic, or compatible composites.
Mixing errors leave soft or greasy patches that never cure correctly. Measure by the product’s stated volume or weight ratio, scrape the cup’s sides and bottom, then transfer critical batches to a second cup for a final clean mix.
Slow epoxy usually gives more time for complicated assemblies and may offer better heat or moisture performance than a five-minute formula. The trade-offs are higher cost, visible glue lines, disposable supplies, and temperature-sensitive curing.
Hide Glue
Hot hide glue and bottled liquid hide glue suit antiques, musical instruments, and joints that may need later disassembly. Controlled heat and moisture soften the bond, giving hide glue a valuable form of repairable reversibility.
Hot hide glue changes from liquid to gel quickly. Warm parts, a prepared glue pot, and a rehearsed assembly help prevent the sudden rubbery drag that appears as the adhesive crosses its gel point.
Moisture resistance is limited, and gram strength, freshness, and temperature affect performance. Hide glue is a poor choice for a wet planter, but it can be the least destructive choice for a historic chair repair.
Construction and Specialty Adhesives
Construction adhesive suits panels, framing components, trim, and building materials that don’t meet with furniture-grade precision. Products vary by solvent base, cure depth, initial grab, exterior rating, foam compatibility, and treated-lumber approval, so label matching matters.
Contact cement works for laminates but offers almost no repositioning once coated faces touch. Urea-formaldehyde and specialty veneer adhesives provide rigid, low-creep bonds for controlled pressing, though their mixing and ventilation demands exceed ordinary PVA.
Ordinary craft adhesive shouldn’t replace a code-approved structural product for beams, subfloors, threaded hardware, or safety-critical construction. Mechanical connections such as threaded inserts may carry service loads more predictably than an unsupported glue line.
Best Wood Glue by Project
The right product follows the project: PVA for fitted furniture, a verified exterior formula for weather, documented food-contact glue for cutting boards, CA for tiny repairs, and epoxy for mixed materials. Joint design remains as influential as chemistry.
Indoor Furniture and Cabinetry
Standard aliphatic-resin PVA is usually the most practical furniture glue for mortise-and-tenon joints, dowels, edge-glued panels, cabinet boxes, shelving, and trim. Select the open time around assembly size and choose a glue-line color that won’t stand out at exposed seams.
Edge joints should close with moderate hand pressure before clamps are added. Fresh, straight surfaces from a well-adjusted jointer or planer reduce clamp force and produce a thin, uniform bond rather than a seam full of adhesive.
Beginners often spread glue over stained or sealed faces and expect the same result as bare wood. Cut or scrape the mating surfaces back to fresh absorbent fibers, since PVA doesn’t reliably penetrate a cured finish.
Outdoor and Waterproof Projects

Exterior work needs an adhesive whose exact formula carries a verifiable water-resistance classification. Type I-rated products face a more demanding test than Type II formulas, yet no rating turns unsealed lumber into waterproof wood.
Build outdoor joints with drainage, protected end grain, movement room, corrosion-resistant fasteners, and an exterior finish. Standing water can swell the fibers until the surrounding wood splits, while trapped moisture encourages decay beside an intact waterproof glue line.
Gorilla sells several adhesive formulas, so verify the bottle rather than assuming every Gorilla product has the same rating. Gorilla Wood Glue also shouldn’t be confused with the company’s foaming polyurethane adhesive.

Gorilla Waterproof Wood Glue
- Waterproof formula for indoor and outdoor repairs
- Natural wood color blends into many projects
- Strong bond for furniture crafts and trim
- Paintable and sandable after curing
- Easy 8 ounce size for everyday fixes
 Buy on Amazon
Cutting Boards and Food Contact
Use a fully cured adhesive backed by current food-contact documentation, not a vague “food safe” phrase. FDA indirect-food-contact status concerns defined cured uses; it doesn’t approve wet glue touching food or guarantee dishwasher resistance.
Titebond states that Titebond III is approved for indirect food contact, but buyers should check the current technical document before use. The FDA food-contact guidance explains how substances used around food packaging and contact surfaces are regulated.
Cutting-board strips need tight, freshly prepared edges and a complete cure before sanding, oiling, or service. Keep the board out of dishwashers and standing water; repeated soaking can cause wood movement and checking regardless of adhesive rating.
Crafts, Models and Small Repairs
Thin CA suits hairline cracks, while medium or thick CA offers better control around models, inlays, decorative parts, turning blanks, and templates. A precision tip prevents the sudden glossy flood that can stain nearby fibers and leave a hard surface ridge.
PVA remains useful for larger porous craft parts where several minutes of repositioning are helpful. Epoxy fits small mixed-material repairs, but weigh its cure time and visible seam against the speed of CA glue.
Chairs and High-Stress Joinery
A loose chair joint needs restored mechanical fit, not a thicker coat of glue. Remove failed adhesive, expose sound wood, and rebuild a worn tenon with fitted material before applying fresh compatible adhesive.
Fresh PVA spread over smooth, cured PVA rarely restores the original bond. Chair rails also face racking and shock, so screws driven across weak joints or CA injected into loose gaps may hide movement without correcting its structural cause.
Furniture originally assembled with hide glue may respond best to fresh hide glue because controlled future disassembly remains possible. Test valuable antiques before scraping, steaming, or forcing parts, since thin shoulders and old grain can tear without warning.
MDF, Plywood and Veneer
MDF edges drink in water-based glue and may swell into a fuzzy ridge. Apply a light sizing coat where needed, let it soak briefly, then spread the bonding coat without flooding the porous edge fibers.
Plywood may fail inside a weak face veneer rather than at the adhesive line. Avoid sanding through thin faces, and use cauls or a press to distribute veneer pressure; isolated clamps can leave dry pockets and visible bubbles.
Large panels benefit from a flat assembly surface, predictable pressure, and prepared clamping access. A rigid workbench makes it easier to spot rocking corners before the adhesive begins to grab.
Mixed Materials and Construction
Wood-to-metal, ceramic, glass, or many plastic bonds call for epoxy or a compatible polyurethane rather than ordinary PVA. Scuff and clean the nonporous face as the adhesive maker directs, then test unknown plastics because some have low surface energy.
Recently pressure-treated lumber can contain too much moisture for dependable water-based bonding. Let stock reach the adhesive’s accepted moisture range and use rated fasteners or structural systems where failure could injure someone; glue alone isn’t a safe shortcut for building loads.
How to Compare Wood Glue Performance
Compare adhesives by failure mode, exposure standard, working time, temperature, moisture tolerance, creep, and repairability. A single psi number can’t predict performance across different species and joints.
Bond Strength and Wood Failure
Manufacturer ASTM D905 figures often list Titebond Original near 3,600 psi, Titebond II near 3,750 psi, and Titebond III near 4,000 psi. These laboratory values depend on specified specimens and shouldn’t be read as the working capacity of a finished chair or shelf.
Wood-failure percentage adds useful context. Torn fibers attached to both sides suggest that local wood failed before the bond, while a clean adhesive-shaped peel points to contamination, poor wetting, low temperature, or an incompatible surface.
The USDA Wood Handbook documents how species, grain direction, moisture, and joint design affect wood performance. Those variables explain why controlled adhesive figures don’t transfer directly to every shop assembly.
Water-Resistance Standards
ANSI/HPVA Type I testing supports the “waterproof” language used for qualifying products, while Type II identifies water-resistant bonds for less severe exposure. Neither term automatically means marine service, permanent immersion, or resistance to wood decay.
Confirm the standard on the exact formula’s data sheet. Retail listings may combine several bottle sizes or versions, and “indoor/outdoor” can describe intended placement without stating a recognized test classification.
Open, Clamp and Cure Times
Open time is the workable period after spreading; assembly time covers fitting and positioning; clamp time is the minimum supported period; full cure is the point at which the adhesive reaches its intended final properties. These milestones aren’t interchangeable.
Many PVA products call for roughly 30–60 minutes of clamping on unstressed joints and about 24 hours before heavy loading. Cold wood, dense species, high humidity, and limited airflow can extend those times, while hot dry air can shorten assembly time.
Temperature and Chalk Failure
Many PVA formulas specify a minimum application temperature around 50–55°F, though the bottle controls. The room, adhesive, and wood must all be warm enough; bringing only the bottle inside doesn’t fix a cold workpiece.
Below its chalk temperature, a water-based adhesive may lose water without forming a continuous polymer film. The cured seam can remain pale, powdery, or chalk-like and may crumble with a faint dry squeak under a scraper; extra drying time won’t reliably rebuild that film.
Wood Moisture Content
Indoor furniture lumber often settles near 6–12% moisture content, depending on climate and the building. Exterior stock may stabilize higher, while wet treated lumber can sit far outside a water-based adhesive’s preferred range.
Check expensive or safety-related material with a calibrated meter at several points. Moisture readings near the surface can differ from the core of thick stock, and a cool board can feel damp without revealing its true moisture level.
Gap Filling and Creep
PVA needs close contact and shouldn’t be selected to fill wide structural voids. Epoxy tolerates limited irregularity better, but severe gaps still need fitted wood because a large resin mass changes stiffness, appearance, heat buildup, and load transfer.
Creep is slow movement under sustained load, often aggravated by heat. A PVA-bonded bent lamination, sun-heated part, or heavily loaded shelf may need a lower-creep adhesive and a joint design that doesn’t ask the glue line to resist constant shear alone.
Glue-Line Color and Reversibility
Dry color matters at pale maple seams, dark walnut repairs, and clear-finished inlays. Test cured glue on scrap because wet adhesive can look milky, amber, or nearly clear before becoming a different final shade.
Reversibility matters more than maximum laboratory strength in antiques and instruments. Hide glue permits controlled reopening, while cured PVA, epoxy, and polyurethane often require scraping or cutting that removes original wood fibers.
Wood Glue Costs and Claims
Compare wood glue by cost per usable ounce, not bottle price. A large container becomes expensive waste if it thickens, freezes, separates, or cures before an occasional user can consume it.
Compare Price per Ounce
Typical US retail ranges place 4-ounce PVA bottles around $4–$7, 8-ounce bottles around $5–$10, 16-ounce bottles around $8–$15, and gallons around $25–$45. Promotions and formulation change those figures, so calculate unit cost at checkout.
Divide the paid price by fluid ounces, then include shipping if it applies only to that item. A $9 eight-ounce bottle costs $1.13 per ounce; a $32 gallon costs $0.25 per ounce but saves nothing if three-quarters spoils.
Bottle Size and Shelf Life
Buy a size that matches likely use over the product’s documented storage life. Narrow caps clog, air enters half-empty bottles, and contaminated brushes can introduce sawdust or microbes that shorten usable life.
Decanting from a gallon into a clean squeeze bottle reduces repeated air exposure and makes application easier. Label each container with the product, batch if available, and opening date; never return leftover adhesive to the main container.
CA and Epoxy Costs
Specialty CA bottles and multi-viscosity kits often cost $10–$30, while small epoxy packs commonly run $8–$25. The true total may include accelerator, debonder, replacement tips, gloves, mixing cups, stirrers, and wasted mixed epoxy.
Small CA bottles reduce nozzle loss for occasional repairs. Larger epoxy packs pay off only when ratios remain accurate and components stay uncontaminated; pumps add convenience but must dispense the manufacturer’s correct ratio.
Product Claims to Verify
Check “waterproof” against a named standard, “food safe” against food-contact documentation, and “stronger than wood” against a defined test. Treat “fast dry” as incomplete until the label separates fixture, clamp, handling, and full-cure time.
Foaming isn’t proof of gap-filling strength, and indoor/outdoor wording doesn’t promise permanent immersion. Marketing language can describe a suitable use without revealing the limitations imposed by joint geometry.
Specifications Worth Checking
Read the technical data sheet and Safety Data Sheet before buying for an unusual project. Focus on minimum application temperature, open time, clamp time, cure time, service temperature, moisture rating, substrates, cleanup, shelf life, and freeze-thaw stability.
Also check glue-line color, viscosity, indirect food-contact status, sandability, paintability, and storage instructions. Product reviews can reveal packaging problems, but uncontrolled reviews can’t replace technical data or a scrap-joint test.
How to Apply Wood Glue
Dry-fit first, spread a continuous film, assemble within open time, and clamp only hard enough to close the joint. Leave the work undisturbed through the stated cure period and remove residue before finishing.
Dry-Fit and Prepare Surfaces

Assemble every part without glue and verify that joints close without extreme clamp force. Lay out clamps, cauls, brushes, mallets, and cleanup tools in sequence so the work doesn’t sit open while you search for a missing clamp.
Joint faces should be clean, sound, and freshly machined. Remove paint, wax, silicone, old adhesive, and oily residue; fresh cutting is often more dependable on teak, ipe, or rosewood than repeated solvent wiping.
Burnished wood from dull blades or forceful fine sanding may resist wetting. Correct machining faults before gluing rather than counting on clamps to flatten twists or close a seam cut by a misaligned jointer.
Size End Grain
End grain absorbs low-viscosity glue quickly and can leave a starved joint. Brush on a light sizing coat, allow brief absorption, then add the bonding coat while following the product’s open-time limit.
Sizing doesn’t turn an end-grain butt joint into strong joinery. Add dowels, splines, loose tenons, screws, or another mechanical feature when the joint will carry bending, pulling, or impact loads.
Apply the Correct Amount
Spread a thin, continuous film across the mating area using a brush, roller, or notched spreader. Large or thirsty surfaces may need glue on both faces, with no dull dry islands left between wet ridges.
A narrow, steady bead of squeeze-out usually shows complete coverage. Streams running down the work waste glue and complicate cleanup, while no squeeze-out at scattered spots can indicate dry coverage or gaps.
Assemble Within Open Time
Start the clock when glue first reaches the wood, not when clamping begins. Divide large cabinets into subassemblies, mark the order, or choose a slower formula when several joints must seat within a short assembly window.
Don’t add water to extend PVA working time without written manufacturer permission. Dilution changes solids content, viscosity, drying behavior, and the amount of water entering the wood fibers.
Clamp with Even Pressure
Place clamps where force reaches the entire seam and tighten them gradually in sequence. Cauls spread pressure, protect soft surfaces, and control alignment; alternating clamps above and below a panel helps reduce bowing.
The goal is full contact, not maximum force. Excess pressure can dent wood, distort parts, or squeeze a poorly designed joint nearly dry, while too little pressure leaves visible gaps; this guide to types of clamps helps match the tool to the assembly.
Allow a Full Cure
Keep the assembly supported for the stated clamp period, then protect it from heavy stress until full cure. Routing, planing, bending, or carrying a panel too early can create microscopic movement before the glue develops its final properties.
Marking the clamp-off and ready-for-load times on painter’s tape prevents guesswork in a busy shop. Add time for cool rooms, dense timber, large glue areas, or humid conditions rather than treating 24 hours as universal.
Remove Squeeze-Out
Wet wiping is fast but can spread diluted PVA into open grain, where it later blocks stain. Letting the bead reach a rubbery texture often permits clean lifting with a scraper without smearing a thin invisible film.
Fully cured residue usually needs mechanical removal. Shine a low raking light across the surface or wipe it lightly with water or mineral spirits compatible with the wood; glue-contaminated areas show up as pale glossy patches before finishing.
Diagnose Wood Glue Failures
The failure surface usually identifies the cause: clean peeling suggests contamination, torn fibers indicate local wood failure, white adhesive suggests cold-film trouble, and an opened exterior joint points to exposure, movement, or incomplete cure.
Cleanly Peeled Glue Line
A glue-shaped film that peels cleanly from one face indicates poor wetting or adhesion. Common causes include paint, wax, oil, polishing residue, dust, old cured glue, an incompatible plastic, or a burnished wood surface.
Remove every weak layer, expose fresh material, restore the fit, and make a test joint from matching scrap. Applying more PVA over the glossy failed film usually repeats the same failure.
Broken Wood Beside Joint
Torn fibers beside an intact seam show that the bond exceeded the wood’s local strength in that event. It doesn’t confirm long-term resistance to water, heat, creep, cyclic stress, or a different load direction.
Inspect how much wood remained attached and whether the break began at a sharp shoulder or short grain. A stress riser can make a strong adhesive look successful while the joint’s geometry remains failure-prone.
White or Chalky Glue
A pale, dusty, or crumbly PVA seam often points to application below the formula’s minimum temperature or chalk point. Excess water and incomplete drying can look similar, but a defective cold-formed film shouldn’t be trusted for structural service.
Warm the room, glue, clamps, and wood before the next attempt, then test a cured scrap joint. Rebuild the questionable assembly rather than expecting heat applied after curing to repair a discontinuous polymer film.
End-Grain and Joint Gaps
Dry end grain can absorb the first coat and leave too little adhesive at the interface. Size it where appropriate, but reinforce weak butt joints and repair wide gaps with fitted wood or an approved gap-tolerant adhesive.
If extreme clamp force is needed during the dry fit, correct the machining before gluing. Clamps may close the seam temporarily while storing stress that pulls it open after release or seasonal moisture change.
Split Panels and Movement
A panel that splits beside a sound glue line often has a movement problem rather than an adhesive problem. Cross-grain frames, fixed breadboard ends, rigid screws, and trapped wide panels can restrain seasonal expansion and shrinkage.
Stronger glue won’t correct the design. Use elongated fastener holes, floating panels, appropriate joinery, and grain-aware construction so each component can move without forcing the adhesive to resist wood movement.
Outdoor Joint Failure
Check whether the exact formula was rated for the exposure and had cured fully before rain. Then inspect standing water, open end grain, failed finish, rot, fastener corrosion, and joint shapes that trap moisture.
Outdoor durability comes from the full system: glue, wood species, joint design, drainage, finish, and maintenance. Re-gluing damp decayed fibers won’t create a durable repair; cut back to sound dry wood.
CA Bloom and Frosting
White bloom forms when CA vapor redeposits around the joint, often after excess adhesive or heavy accelerator use. Improve airflow, use less glue, keep the nozzle close to the seam, and test visible finishes for surface marking.
Don’t wipe uncured CA with bare fingers or cotton cloth. Skin bonds in seconds, and cotton or wool can trigger a hot reaction that produces smoke, a sharp chemical odor, and serious burns.
Old or Frozen Glue
Some PVA products tolerate limited freeze-thaw cycles, while repeated freezing can cause permanent separation. Replace glue that stays lumpy, curdled, stringy, grainy, or divided after warming and thorough mixing.
Old glue may look normal yet cure slowly or produce a weak film. Date bottles and test questionable stock between two scraps; break the sample after a full cure and inspect for wood-fiber transfer.
Safety, Storage and Disposal
Wear eye protection, control skin exposure, ventilate vapors, and follow the product’s Safety Data Sheet. CA, epoxy, polyurethane, and solvent-based products present different hazards, so one glove or cleanup method won’t fit every chemistry.
Personal Protection and Ventilation
Protect eyes during dispensing and clamping because a nozzle can spit when a blockage clears. Use chemical-compatible nitrile gloves, local airflow, and clean tools, while keeping food and drinks away from the work area.
Read the Safety Data Sheet for ventilation, first aid, storage, and glove recommendations. Sanding cured adhesive can create fine dust, so collect it at the source and wear suitable respiratory protection for the material being sanded.
Cyanoacrylate Safety
CA can bond skin and eyelids in seconds. Don’t pull bonded skin apart; soak it in warm soapy water and follow medical guidance, while eye exposure needs flushing and urgent professional care.
Keep CA away from cotton, wool, and paper towels used as wiping pads because the reaction can release intense heat. The Poison Control super-glue guidance explains exposure responses and reinforces why debonder should never be placed in an eye.
Epoxy and Polyurethane Safety
Repeated epoxy skin exposure can lead to sensitization, making later contact trigger a stronger reaction. Measure with dedicated tools, wear compatible gloves, and avoid cleaning resin from skin with solvents that can increase dermal absorption.
Large epoxy batches can become dangerously hot because curing generates heat faster than a deep cup releases it. Mix only the needed volume and spread it as directed; polyurethane also sticks strongly to skin and requires preventive glove use.
Storage and Freeze Damage
Store containers tightly closed within the stated temperature range and wipe nozzles before replacing caps. Keep PVA away from freezing temperatures without documented freeze-thaw tolerance, and never judge damaged adhesive by color alone.
Follow the manufacturer’s CA storage directions. If refrigerated, let the sealed bottle reach room temperature before opening so humid air doesn’t condense inside and shorten shelf life.
Responsible Adhesive Disposal
Don’t pour liquid adhesive, resin, hardener, accelerator, or solvent into drains, soil, or stormwater. Keep components in labeled containers and follow local household hazardous-waste rules for uncured chemicals.
Some fully cured products may be accepted with ordinary solid waste, but local rules and product chemistry control. Never mix leftovers merely to dispose of them in one mass, since a large epoxy batch can overheat; use your municipality’s hazardous-waste program.
FAQs
What Is The Strongest Glue For Wood?
Polyurethane glue and high-quality PVA wood glue are among the strongest options for most wood joints. PVA glue, such as Type II or Type III wood glue, is easy to use and creates a bond stronger than the surrounding wood when joints fit tightly. Epoxy is often best for difficult repairs, oily woods, or uneven surfaces.
How Long Should Wood Glue Be Clamped?
Most wood glue should be clamped for at least 30 to 60 minutes. Check the product label because temperature, humidity, wood type, and joint design can affect clamp time. Avoid heavy stress on the joint for about 24 hours, even after removing the clamps, so the glue can fully cure.
Is Gorilla Wood Glue Waterproof?
Gorilla Wood Glue is water-resistant, but it is not fully waterproof for permanent outdoor exposure. It is rated for Type II water resistance, making it suitable for projects that may experience occasional moisture. For outdoor furniture or regularly wet areas, use a Type III waterproof wood glue or a suitable exterior epoxy.
Can Wood Glue Fill Gaps?
Standard wood glue should not be used to fill large gaps because it is strongest when wood surfaces fit tightly together. Small imperfections may be acceptable, but wide gaps can weaken the joint. For gaps, use epoxy, a wood filler, or a glued-in wood shim, then clamp the pieces securely.
What Is The Difference Between Wood Glue And Super Glue?
Wood glue is designed for porous wood surfaces and creates strong, flexible joints over a larger area. Super glue bonds very quickly but can become brittle and is better for small repairs or temporary positioning. For furniture joints, cabinetry, and woodworking projects, wood glue is usually the more reliable choice.


