


A pressure pot for resin is a sealed, pressure-rated vessel that uses compressed air during curing. It compresses trapped bubbles into much smaller volumes, helping castings develop smooth surfaces and clearer details without physically removing the air.
Table of Contents
What Is a Pressure Pot for Resin?
A resin pressure pot holds a filled mold inside a sealed chamber while regulated compressed air raises the internal pressure. It differs from cooking vessels, vacuum chambers, and compressor receiver tanks in both construction and intended use.
Resin Pressure Pot Defined
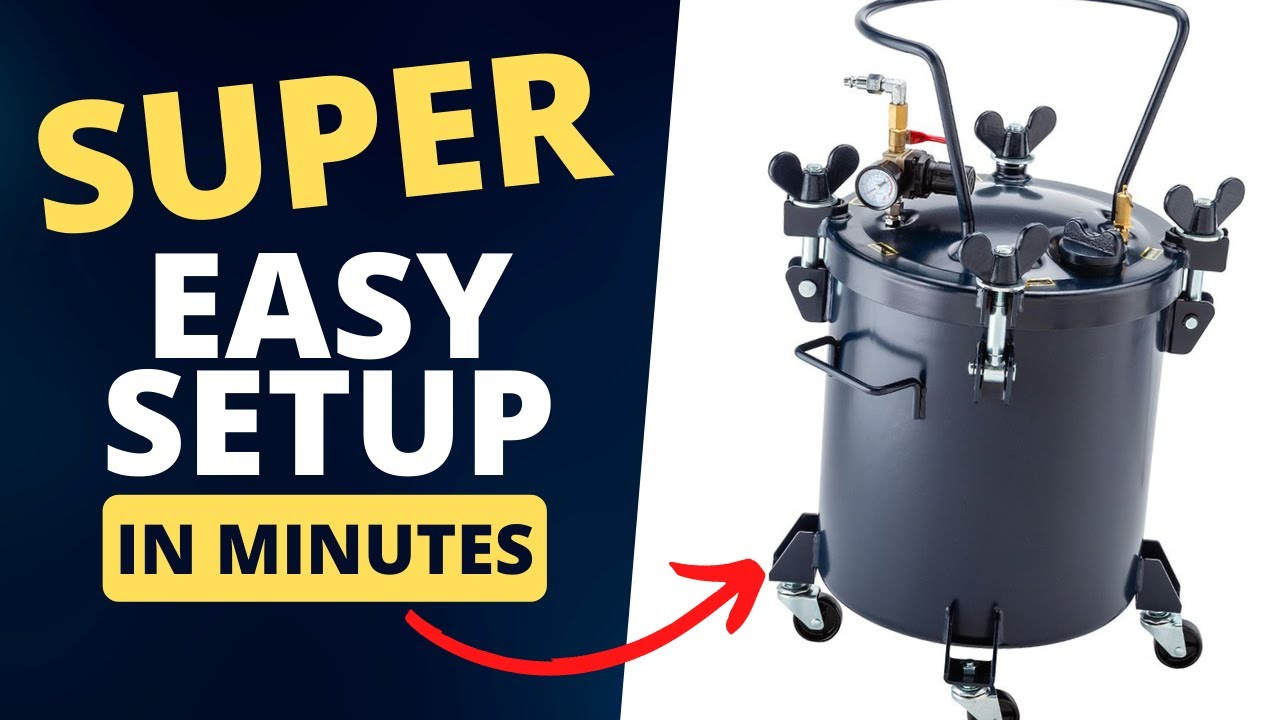
A resin casting pressure pot consists of a rated steel vessel, gasketed lid, clamps, regulator, gauge, air inlet, exhaust valve, and safety-relief valve. Purpose-built models may include a flat casting floor or rack, while paint tanks often contain dip tubes and coating-feed ports that resin users don’t need.
Bubble Compression Explained
Pressure makes gas bubbles smaller according to Boyle’s law, which describes the inverse relationship between gas pressure and volume at roughly constant temperature. At 50 PSI gauge pressure near sea level, the vessel reaches about 64.7 PSIA, so an idealized bubble contracts to roughly 23% of its atmospheric volume. The Boyle’s law explanation provides the underlying equation, P₁V₁ = P₂V₂.
The pot doesn’t extract that gas. It compresses visible bubbles until cured resin holds them at a much smaller size. Thick resin, late pressurization, moisture, and large trapped pockets can still leave defects.
Pressure Cooker Differences
A kitchen pressure cooker uses steam and heat under its documented cooking conditions. A casting pot receives compressed shop air through rated fittings, so a cooker, canner, multicooker, bucket, glass jar, or PVC chamber is not a safe substitute.
Compatible Casting Materials
Common materials include epoxy, polyurethane, and compatible polyester casting resins. Typical projects include dice, jewelry, pen blanks, small wood-and-resin forms, and blanks later shaped on a wood lathe. Check the resin TDS because viscosity and moisture sensitivity vary sharply between products.
Pressure Through Cure
Keep the casting pressurized for the cure or demold period stated by the resin maker. Releasing air while the resin remains fluid lets compressed bubbles re-expand, sometimes creating pinholes several minutes after a casting looked clear.
Pressure Pot Versus Vacuum Chamber

A pressure pot compresses bubbles after pouring, while a vacuum chamber expands gas so it can leave the mixed material. The better tool depends on viscosity, working time, mold geometry, and whether the task involves resin or silicone mold rubber.
Pressure Pot Uses
Pressure works well for dice, pen blanks, detailed molds, pigmented castings, and resin surrounding porous wood. It also suits short-pot-life products that would lose too much working time during vacuum degassing, provided the mold reaches pressure before gelation begins.
Vacuum Chamber Uses
A vacuum chamber commonly degasses mixed silicone before mold making and some low-viscosity resins before pouring. Material can rise into a frothy dome under vacuum, so use a container with ample empty headspace rather than filling it near the rim.
When Both Help
Both tools can help with demanding clear castings: degas the silicone used to make the mold, then pressure-cure the poured resin. Vacuum-degassing resin before pressure casting may also help, but only if its pot life permits mixing, degassing, pouring, loading, sealing, and pressurizing.
Choosing Between Them
| Decision point | Pressure pot | Vacuum chamber |
|---|---|---|
| Main action | Compresses bubbles | Expands and releases gas |
| Typical stage | After resin enters the mold | Before pouring |
| Strong use case | Dice, blanks, detailed castings | Silicone and low-viscosity mixtures |
| Main constraint | Mold support and pressure rating | Foam rise and working time |
| Process duration | Often remains sealed through cure | Usually runs for a shorter degassing cycle |
Choose pressure when the primary goal is making bubbles visually tiny inside a poured mold. Choose vacuum when the material can release expanded gas before it sets. Neither method repairs an incorrect mix ratio, wet resin, or poor mold venting.
Resin Pressure and Compressor Requirements
Many hobby casting processes operate around 40–60 PSI, but that range isn’t a universal instruction. The selected pressure must fit the resin process, mold construction, vessel manual, and every connected component.
Common 40–60 PSI Range
Start with the resin maker’s guidance and a tested process rather than automatically setting 60 PSI. Some low-viscosity resin produces clean results below 40 PSI, while raising pressure can distort soft molds without producing a visible quality gain.
Working vs Maximum Pressure
The maximum marked pressure isn’t a routine casting target. Separate the vessel’s rated working pressure from the regulator range, gauge range, relief-valve setting, and compressor cutoff. Use a normal operating pressure supported by the manual rather than working close to a limit.
Lowest-Rated Component Rule
Never exceed the manufacturer’s rated working pressure or the rating of the lowest-rated component. This rule covers the tank, lid, clamps, gasket, regulator, gauge, valves, hose, couplers, plugs, and threaded fittings.
Gauge and Relief Valve
Read pressure at the vessel gauge, not solely at the compressor. A scale reasonably close to the working range makes small changes easier to see. The relief valve is backup protection, not the control used to stop every fill cycle, and it must never be plugged or disabled.
Air Volume Calculation
A sealed pot needs air volume rather than continuous high airflow. For a 2.5-gallon vessel at 50 PSIG, the absolute-pressure ratio is (50 + 14.7) ÷ 14.7, or about 4.4. The vessel then contains an ideal free-air equivalent of about 11 gallons, meaning roughly 8.5 extra gallons entered beyond its initial atmospheric charge.
Real demand runs higher because hoses have volume, regulators create losses, fittings leak slightly, and compression heats the air. Higher elevations also change atmospheric pressure, so this calculation works as a selection estimate, not a fill-time promise.
Small Compressor Suitability
A compact compressor can fill a 2.5-gallon or 10-liter pot if it reaches the target pressure within the resin’s working time and stays inside its duty cycle. Check delivered CFM at the relevant PSI, receiver capacity, noise, and maximum pressure. A tiny unit that takes eight minutes is a poor match for resin with six minutes of usable time.
Required Air Components
- A compressed-air hose rated above the planned operating pressure
- Matching quick-connect couplers and NPT fittings
- A regulator and readable vessel gauge
- An inlet shutoff valve and controlled bleed valve
- A functioning safety-relief valve
- Thread sealant approved for the fitting and compressed-air service
- An optional moisture separator where the compressor produces wet air
Buying couplers from one profile family avoids the loose, half-latched feel caused by mixing incompatible industrial and automotive styles. Replace fittings with damaged threads; forcing them can create a connection that feels tight yet leaks under full chamber pressure.
How to Choose a Pressure Pot
Choose a pressure pot by intended use, internal dimensions, documented working pressure, lid hardware, fitting compatibility, and replacement-part support. Advertised gallon capacity alone doesn’t reveal whether your largest mold fits beneath the lid.
Purpose-Built vs Converted
A purpose-built resin pot usually has a flatter interior and fewer paint-feed parts, reducing setup work. A pressure-rated paint tank may cost less at checkout, but plugs, valves, couplers, a level floor, and a new gasket can erase that saving. Conversion must never weaken or structurally alter the vessel.
Capacity and Mold Fit
A 2.5-gallon pot holds about 9.5 liters, while 10 liters equals about 2.64 US gallons. A 5-gallon vessel holds about 18.9 liters. Measure internal diameter, usable height, rack thickness, lid intrusion, and hand clearance. A wide dice mold may fail to fit a tall narrow pot with the same nominal volume.
Lid, Gasket, and Clamps
Inspect clamp spacing, lid alignment, gasket condition, and replacement availability. Tighten clamps in the sequence described by the maker, usually by alternating across the lid rather than fully tightening one side first. For related shop-holding details, see these types of clamps, while recognizing that vessel clamps must remain the original rated hardware.
Regulator, Gauge, Relief Valve
Verify which controls arrive installed and whether photographs show the exact model. The pot needs a regulator, vessel gauge, relief valve, inlet shutoff, and controlled exhaust path. Check that replacement gauges and valves have compatible threads and equal or higher ratings.
Ports, NPT, and Couplers
North American tanks commonly use NPT, or National Pipe Thread, but size is nominal and doesn’t equal the measured outside diameter. Confirm port size, male or female orientation, coupler profile, and sealant instructions. Never assume two fittings match because they appear nearly the same width.
Floors, Racks, and Shelves
A rounded tank bottom can tilt a filled mold enough to leave one edge thin and the other overflowing. Choose a rigid, flat insert or rack that doesn’t rock. Shelves need room for safe lifting and must resist flex under wet resin. A stable workbench setup also helps keep the entire pot level.
Parts, Warranty, and Support
Check access to gaskets, gauges, regulators, relief valves, couplers, and clamp hardware before buying. A pot with no documented replacement gasket can become unusable after a small tear, making parts support more valuable than a minor initial discount.
Compare Pressure Pot Options and Costs
Entry-level converted paint pots often cost about $80–$150 before parts, while purpose-built hobby resin pots commonly fall near $180–$400 or more. Larger professional vessels may exceed $500. Compare the complete working setup, not the tank price by itself.
Featured Resin Pressure Pots
These featured options include a resin-focused model and a paint-and-resin tank; verify the exact listing, manual, included hardware, and pressure documentation before ordering.

California Air Tools Resin Pressure Pot
- Made for epoxy resin casting
- 2.5 gallon tank capacity
- Coated steel tank construction
- Portable design for workspaces
- Helps create smoother resin results
 Buy on Amazon

VEVOR 10L Paint and Resin Pressure Pot
- 10 liter pressure pot capacity
- Supports spray painting projects
- Useful for resin crafting
- Includes metal rack and sealant
- Suitable for home and workshop use
Buy on Amazon
Specifications to Verify
- Exact model name and stated resin use
- Internal diameter and usable height
- Documented working-pressure limit
- Gauge range and relief-valve setting
- Port thread type and coupler profile
- Included rack, regulator, valves, plugs, and hose
- Replacement gasket availability and warranty terms
- Assembly and initial leak-test requirements
Marketplace listings sometimes combine reviews or specifications from several sizes. Match the model number on the listing, manual, carton, and vessel nameplate. If those disagree, pause assembly and ask the seller or manufacturer for written model confirmation.
Complete Setup Costs
| Setup item | Indicative cost | Common hidden expense |
|---|---|---|
| Paint pot adapted for resin | $80–$150 | Plugs, valves, gasket, and flat insert |
| Purpose-built hobby pot | $180–$400+ | Hose or coupler may be separate |
| Small compressor | $100–$300 | Hose, moisture control, and noise management |
| Fittings and valves | $20–$60+ | Thread mismatch or replacement gauge |
| Rack or shelves | $20–$100+ | Custom sizes and resin-resistant liners |
| PPE and maintenance supplies | $20–$80+ | Recurring gloves, seals, and cleaning materials |
These are indicative market bands, not quoted sale prices. Check the exact model’s purchase price, shipping charge, taxes, included parts, and warranty on the day you order.
Best Size by Project
The 2.5-gallon or 10-liter class suits dice, jewelry, pen blanks, and compact molds. A 5-gallon pot better supports taller blanks, wider molds, and multiple pieces per batch, but it takes more air and floor space. Match blank dimensions to your mini lathe before paying for unused vessel height.
Purpose-Built vs Paint Pot
Buy purpose-built equipment if you value quick setup, a casting-friendly floor, and clearer resin documentation. A paint-and-resin pot can suit a careful buyer who verifies every fitting and seals unused feed ports correctly. A low purchase price loses appeal if the conversion requires several uncertain components.
How to Set Up a Pressure Pot
Set up a pressure pot by inspecting the vessel, installing rated fittings, performing an empty leak test, staging the casting, and pressurizing before gelation. Keep pressure on through the resin maker’s stated cure period, then vent completely before opening.
Inspect Vessel and Manual
Read the vessel manual, compressor instructions, resin TDS, and resin SDS. Look for dents, corrosion, damaged threads, bent clamps, gasket cuts, and missing safety parts. Don’t pressurize a vessel with shipping damage while waiting to see whether it holds.
Assemble Rated Fittings
Install only compatible fittings with ratings at or above the planned pressure. Apply approved thread sealant in the direction and amount stated by its maker, keeping fragments out of regulators and valve passages. Hold the proper fitting body with a wrench so tightening doesn’t twist adjacent lid hardware.
Perform Soap Leak Test

Run the manufacturer’s empty test, increasing pressure gradually. Brush soap solution over external threads, the lid seam, couplers, gauge connection, valves, and unused ports. A leak forms growing foam domes rather than a static wet film. Depressurize fully before making any adjustment.
Prepare Mold and Resin
Level the rack, confirm lid clearance, stage the compressor, and place tools within reach before mixing. Measure resin by the maker’s stated weight or volume ratio and scrape the cup walls during mixing. Pour in a thin stream where practical to reduce introduced air.
Practical Notes From Real-World Use: A leaking coupler often gives a faint hiss and turns cold during filling. Soap bubbles swell slowly around tiny thread leaks, while resin on a gasket feels like a hard, glossy grain beneath the fingertip. Find those faults before mixing a short-pot-life batch.
Workshop casting observations
Pressurize Before Gelation
Load the mold, seat the lid, and tighten clamps in the prescribed sequence. Raise pressure slowly while watching the vessel gauge. Fast airflow can disturb uncovered molds or splash resin if the inlet directs air downward. Reach the validated pressure during the resin’s usable working window.
Maintain Pressure Through Cure
Close the inlet after filling if the manual directs this, then monitor the vessel for abnormal loss. Don’t leave a compressor running unattended to hide a leak. Keep the casting sealed for the resin’s stated cure or demold period, since warmth alone doesn’t prove adequate structural cure.
Depressurize and Open Safely
Use the designated bleed valve and vent at a controlled rate. Wait for the gauge to reach zero, then verify that airflow has stopped before touching clamps. Stand beside the lid rather than over it, loosen clamps evenly, and lift cautiously. A blocked or damaged gauge can show a false zero.
Pressure Pot Safety Requirements
A pressure pot is a pressure vessel and must be operated within its documentation, with a regulator, readable gauge, sound clamps, intact gasket, and functioning relief valve. Pressure safety and resin chemical safety require separate controls.
Pressure Vessel Rules
- Never exceed the documented working-pressure limit.
- Never plug, restrain, or remove the relief valve.
- Don’t drill, weld, grind, or structurally modify the vessel.
- Don’t use a dented, cracked, heavily corroded, or fire-damaged tank.
- Keep your face and body away from the lid during filling.
- Never tighten fittings or release clamps while pressurized.
- Don’t leave a known leaking system unattended.
Workplace rules vary by vessel type, jurisdiction, and use. The OSHA air receiver standard illustrates how regulators treat pressure equipment, but it doesn’t make every hobby casting pot an air receiver or replace the product manual.
Prohibited Vessel Substitutes
Never use pressure cookers, electric multicookers, canners, PVC pipe, buckets, glass containers, or undocumented tanks. Their material, closures, valves, and pressure assumptions don’t match resin casting with shop air. A vessel that holds water without leaking may still fail under compressed-gas energy.
Mold Support and Shore A
Thin, hollow, or very soft silicone molds can compress inward, producing concave walls, narrow cavities, flash, or shifted inserts. Shore A indicates flexible rubber hardness, but wall thickness and geometry matter too. Use a rigid mother mold, flat rack, and a low-cost test pour before committing expensive resin or inclusions.
Resin, PPE, and Ventilation
Wear the gloves and eye protection named in the SDS, provide ventilation, and use respiratory protection where the risk assessment calls for it. Pressure doesn’t contain every exposure once the lid opens. The OSHA Hazard Communication resources explain labels and safety-data information used to assess chemical handling risks.
Exotherm and Pour Limits
Resin curing releases heat, and thick masses can become much hotter than shallow pours. Follow the stated maximum pour depth and batch size. Don’t bundle many large molds into a confined rack without checking heat behavior; a hot batch can discolor, crack, smoke, or damage the mold.
Manuals, SDS, and TDS
The vessel manual defines assembly and pressure limits. The SDS covers hazards, PPE, storage, spills, and first aid, while the TDS covers mix ratio, pot life, cure schedule, and pour limits. Keep the documents near the work area rather than relying on memory or forum advice.
ASME and OSHA Context
ASME Boiler and Pressure Vessel Code Section VIII and OSHA rules may matter in commercial or regulated settings, depending on jurisdiction, vessel classification, and workplace use. Don’t describe a tank as ASME-certified without a matching nameplate and documentation. The ASME Section VIII description outlines the code’s pressure-vessel scope.
Troubleshooting Resin Pressure Casting
Most pressure-casting failures trace to late pressurization, leaks, moisture, unsupported molds, incorrect mixing, or contaminated sealing surfaces. Diagnose the process in that order rather than raising pressure and risking equipment or mold damage.
Visible Resin Bubbles
Review when the pot reached pressure, whether pressure held through cure, and whether the resin or inclusions contained moisture. Large pockets trapped beneath mold overhangs may stay visible because pressure shrinks rather than removes them. Pour into the lowest point, vent trapped areas, and pre-stage equipment to prevent late loading.
Rapid Pressure Loss
Depressurize, then inspect the gasket, lid alignment, gauge threads, regulator joints, quick coupler, bleed valve, relief valve, and plugged paint-feed ports. Use soap solution during the next controlled test. Replace damaged parts rather than applying excessive clamp force or leaving the compressor connected to mask the leak.
Temperature-Related Gauge Changes
Compressed air warms during filling and may lose some indicated pressure as it cools. A small change that stabilizes differs from a gauge that keeps falling. Test the empty pot at a steady room temperature, record pressure and time, and use soap solution to separate cooling from leakage.
Distorted Silicone Molds
Add a rigid support shell, thicken weak mold walls, level the shelf, and reduce unsupported cavities. Check whether the selected pressure exceeds what the mold design needs. Pressing harder rarely fixes geometry; it can turn straight sides into a subtle inward bow that becomes obvious when the finished blank spins in a lathe chuck.
Foaming or Poor Cures
Pressure can’t correct moisture contamination, an incorrect ratio, incomplete mixing, expired resin, or incompatible pigment. Moisture-sensitive polyurethane often produces pale foam or a spongy surface when contaminated. Store containers sealed, use dry tools, follow the TDS, and measure with the specified method.
Lid Sealing Failures
Remove cured resin from the sealing land without gouging it, then inspect for a twisted, flattened, swollen, or cut gasket. Confirm that the lid isn’t obstructed and clamps tighten evenly. Don’t use pipes, extension bars, or improvised clamps to force a seal; replace the failed sealing part.
Maintenance and Replacement Parts
Wipe resin drips before they harden, keep the gasket clean, drain compressor moisture, and inspect hoses for abrasion or cracking. Check gauge response and relief-valve service instructions at the maker’s stated interval. Store the pot dry with the lid protected from impacts, and keep a model-matched spare gasket for production work.
Beginners often focus on PSI while overlooking time, mold support, and sealing condition. The more reliable workaround is a repeatable pre-casting checklist: level rack, dry materials, open working window, tested seal, correct pressure, recorded cure time, zero gauge, then lid release. That routine prevents more failed castings than chasing higher pressure.
FAQs
What PSI Should I Use For Resin Casting?
For most epoxy resin casting, use 40 to 60 PSI in a pressure pot. This pressure compresses bubbles so they become nearly invisible in the cured resin. Always follow your resin manufacturer’s instructions and never exceed the pressure rating of your pot.
Can A Paint Pressure Pot Be Used For Resin?
A paint pressure pot can be used for resin if it is properly modified and rated for the required pressure. Remove or seal paint-specific components, add a suitable air connection, and check all seals before use. Never exceed the manufacturer’s maximum PSI rating.
How Long Should Resin Stay In A Pressure Pot?
Resin should stay in a pressure pot until it has fully cured according to the manufacturer’s cure time. Opening the pot too early can allow compressed bubbles to expand and create defects. Most resins need several hours or overnight under pressure.
What Size Compressor Do I Need For A Pressure Pot?
A small compressor with a 2- to 5-gallon tank is usually enough for a resin pressure pot. It only needs to fill the pot to about 40 to 60 PSI and maintain that pressure. Larger pots may benefit from a compressor with higher tank capacity and airflow.
Will Silicone Molds Collapse In A Pressure Pot?
Most properly supported silicone molds will not collapse at normal resin pressure pot settings of 40 to 60 PSI. Very thin, soft, or unsupported molds can distort under pressure. Place molds in a rigid support box or container to help them keep their shape.


